Connecting the Kroks Rt-Brd DS e + Quectel EP06-E router for mobile proxies
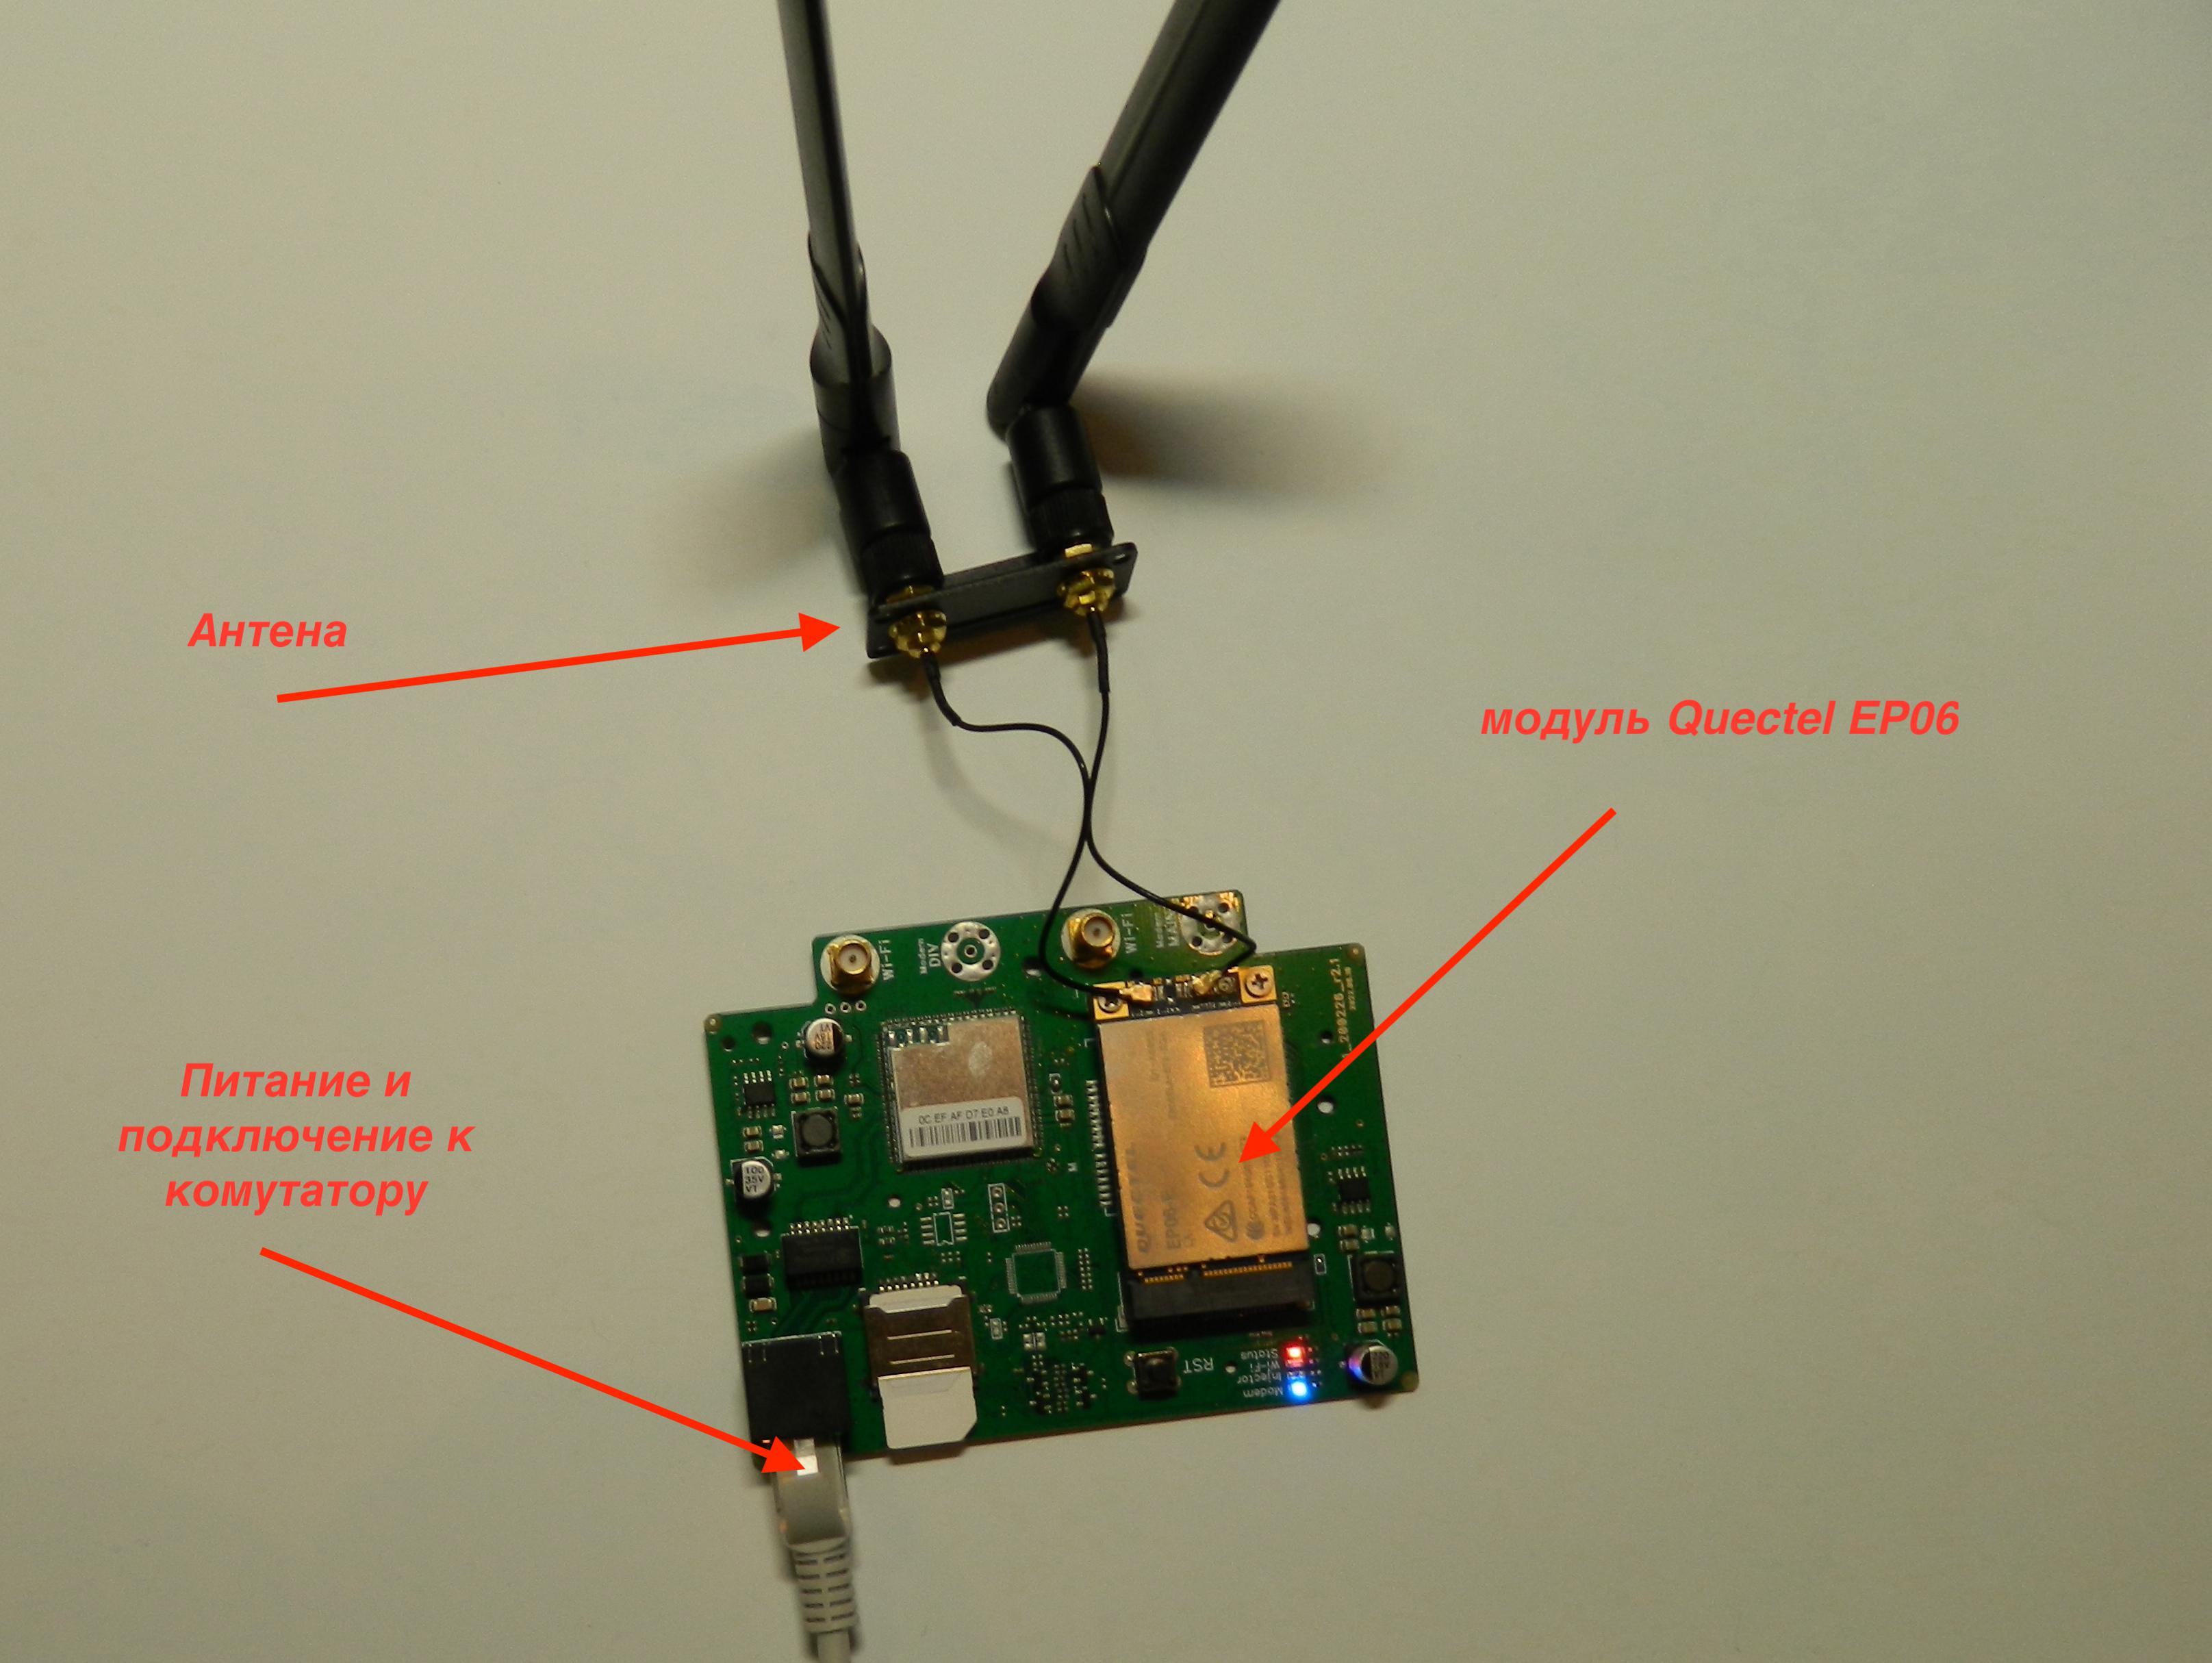
Let's look at the connection diagram and the main elements of a mobile proxy farm on LTE network routers using the example of “Kroks Rt-Brd DS e” with the “Quectel EP06” radio module.
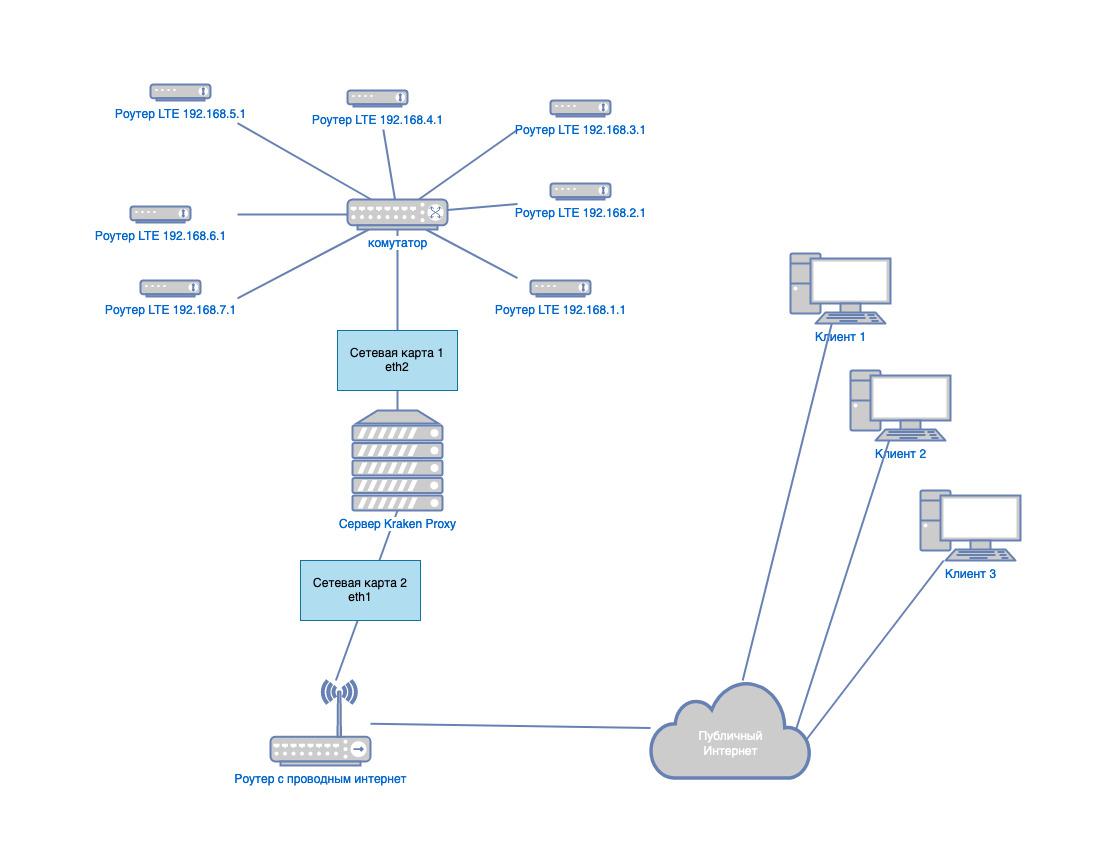
Any PC that meets the minimum system requirements can act as a server. In this case, when connecting via a network interface, we need at least two network cards. The first and subsequent network cards are connected to a managed or unmanaged switch. The second connects to a router with wired Internet, through which local and remote access to the control panel and proxy will be provided. LTE routers, such as (TP-Link TL-MR3020, Antex, Kroks), are connected directly to the switch itself, but you must first set different IP addresses. Each router must have different subnets in the format 192.168.x.1, where x is a subnet that should not be the same as the wired Internet or other modems to prevent network conflict.
Let's install the preliminary settings of the Kroks router by connecting it to our work PC in a free network socket. By default, the IP address is assigned dynamically via DHCP; opening the settings of our connection, we will see the required IP panel - this is the gateway address.
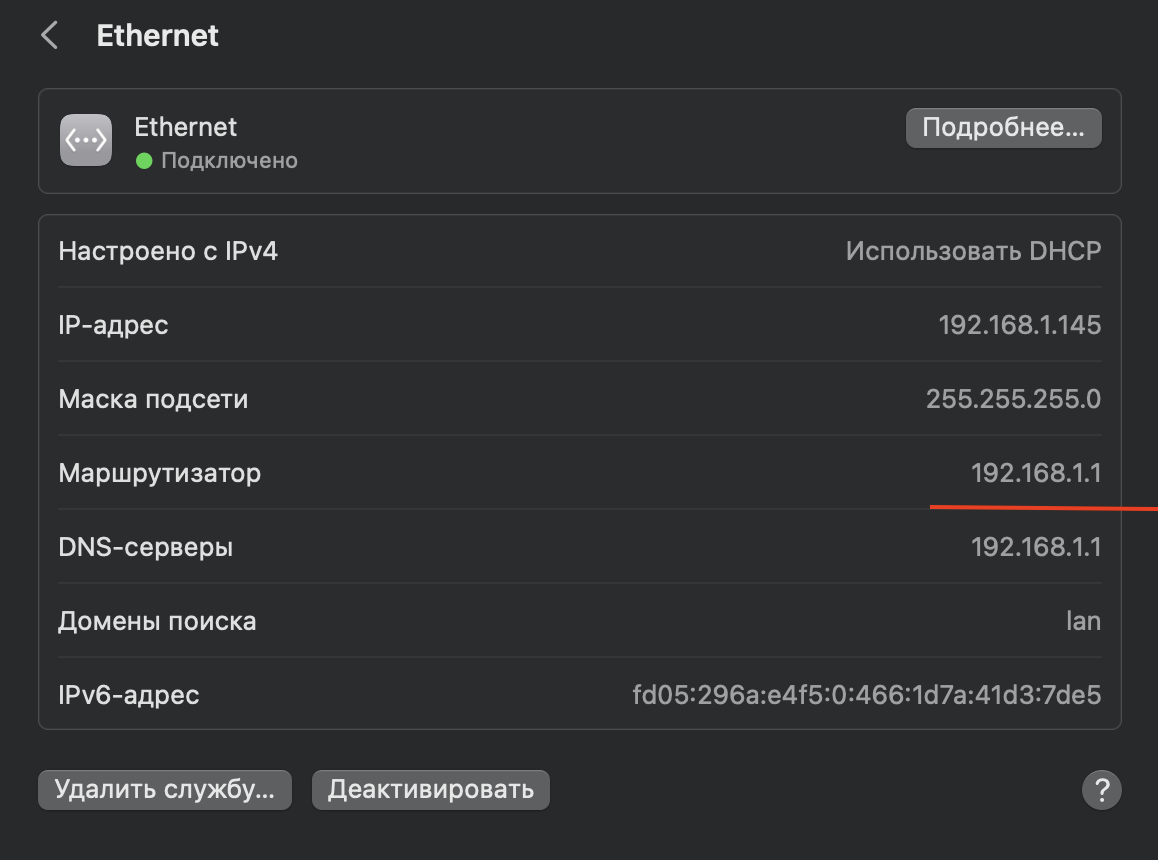
Router settings “Kroks Rt-Brd DS e s”
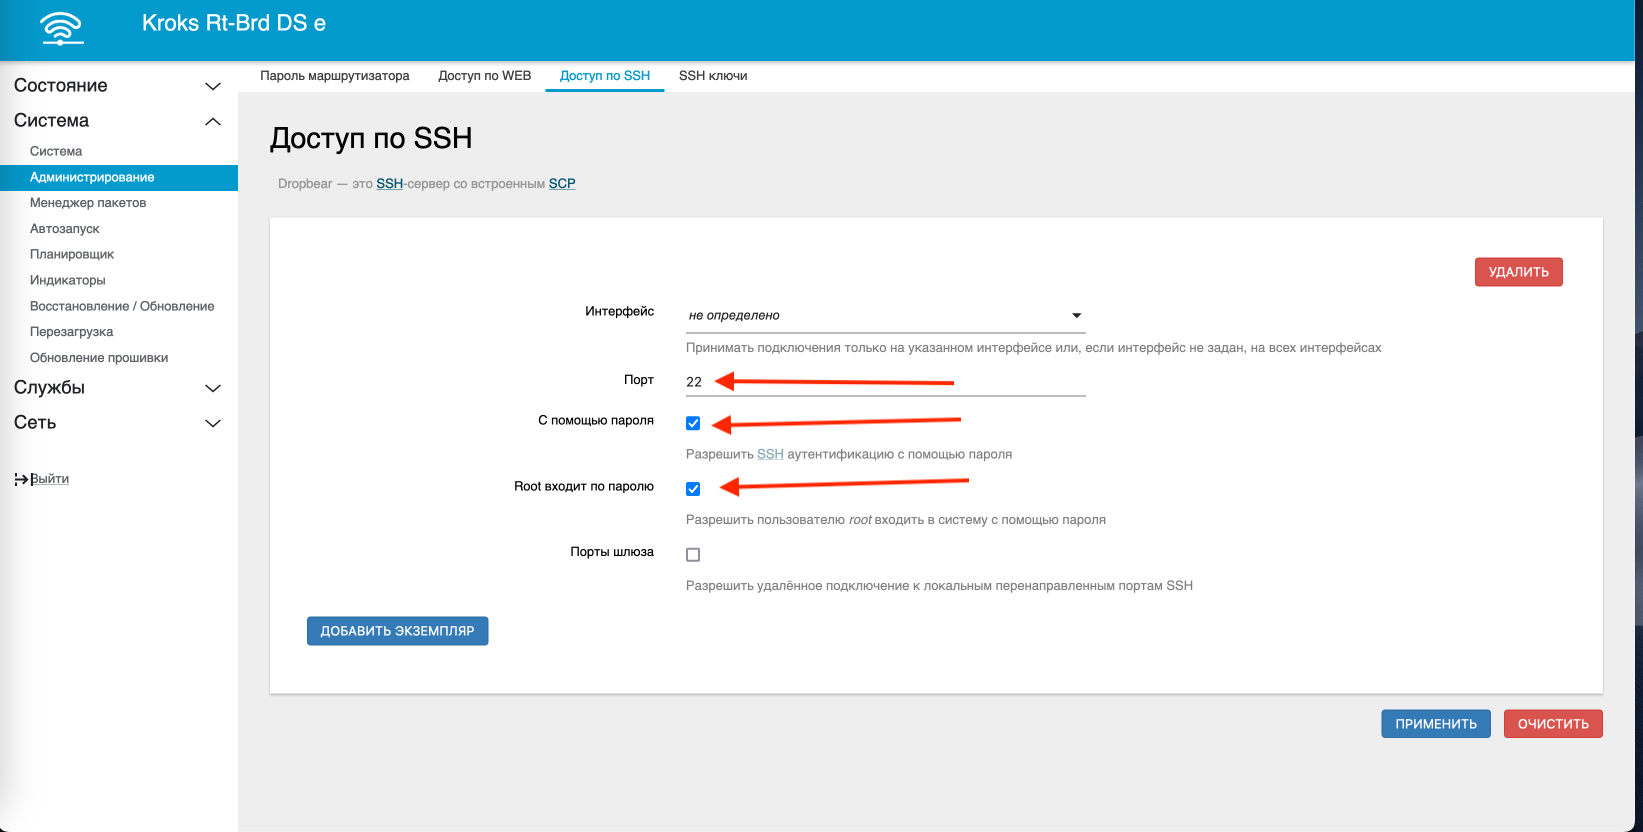
Open your favorite browser and enter the gateway IP http://192.168.1.1. The router control panel will open in front of us - this is OpenWRT, if you launched the router for the first time, then you will be required to set a password the first time you log in. You can also set the password in the “System->Administration->Administrator Password” section. Next, we need to allow access via ssh under the root user using a password, check the necessary boxes, and save the settings.
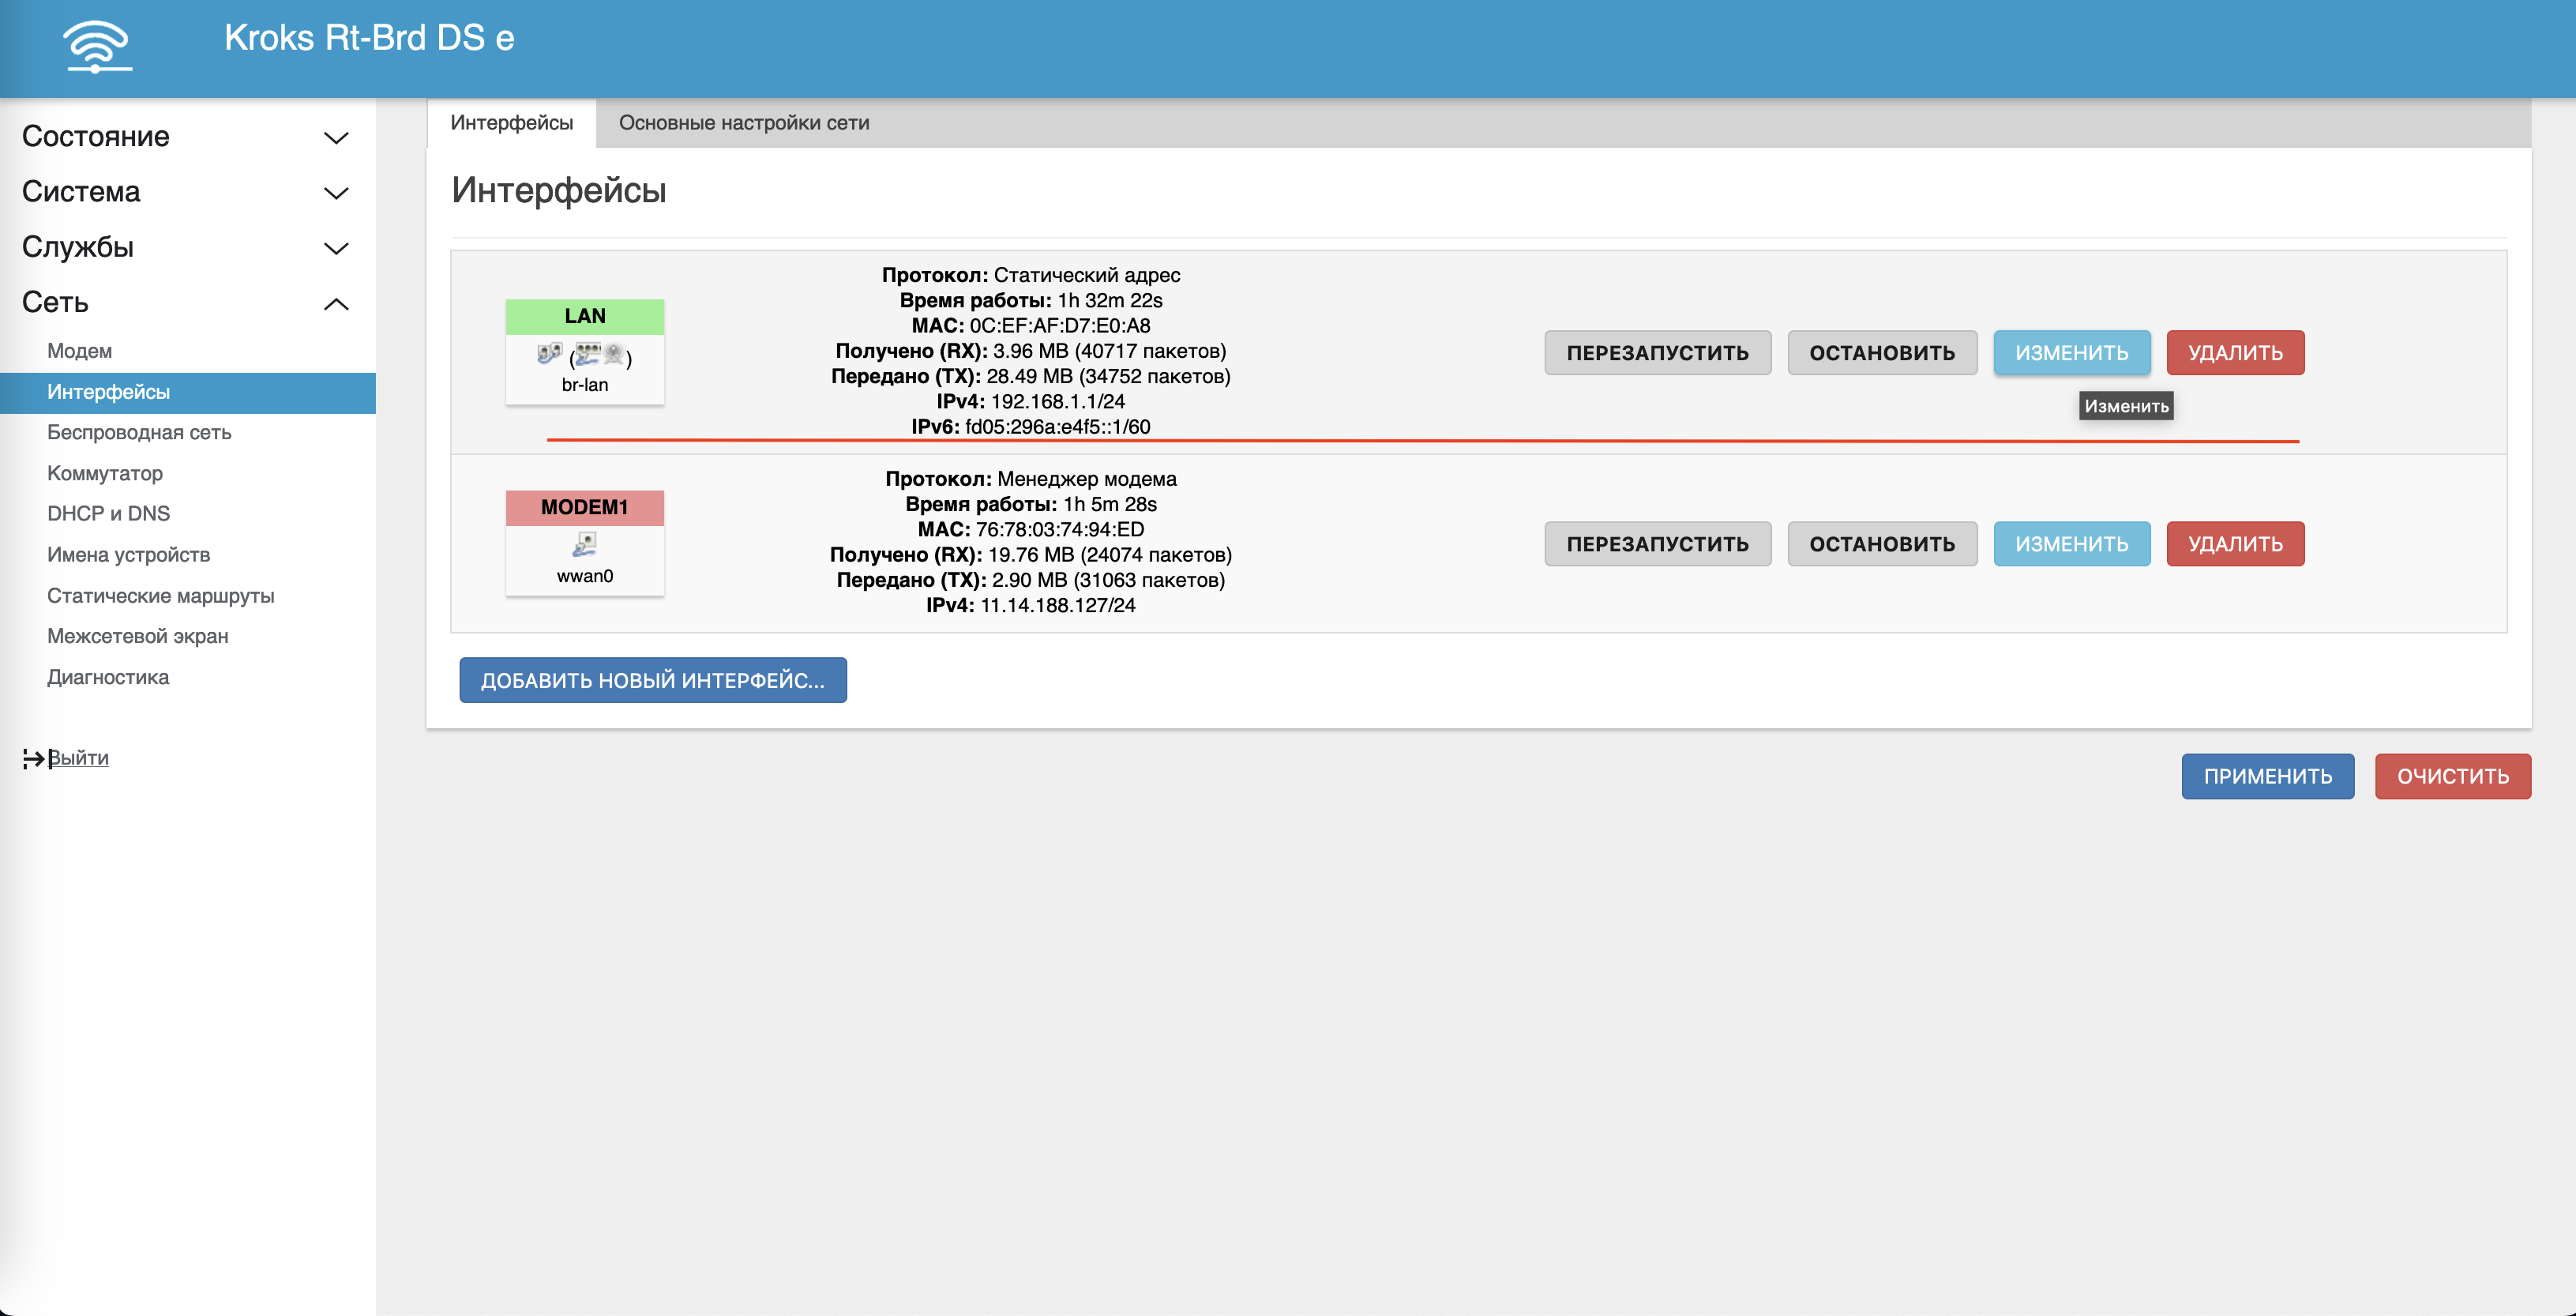
The next step is to set a unique subnet for the router. To do this, go to the “Network->Interfaces” section and in the “LAN” interface click the change button.
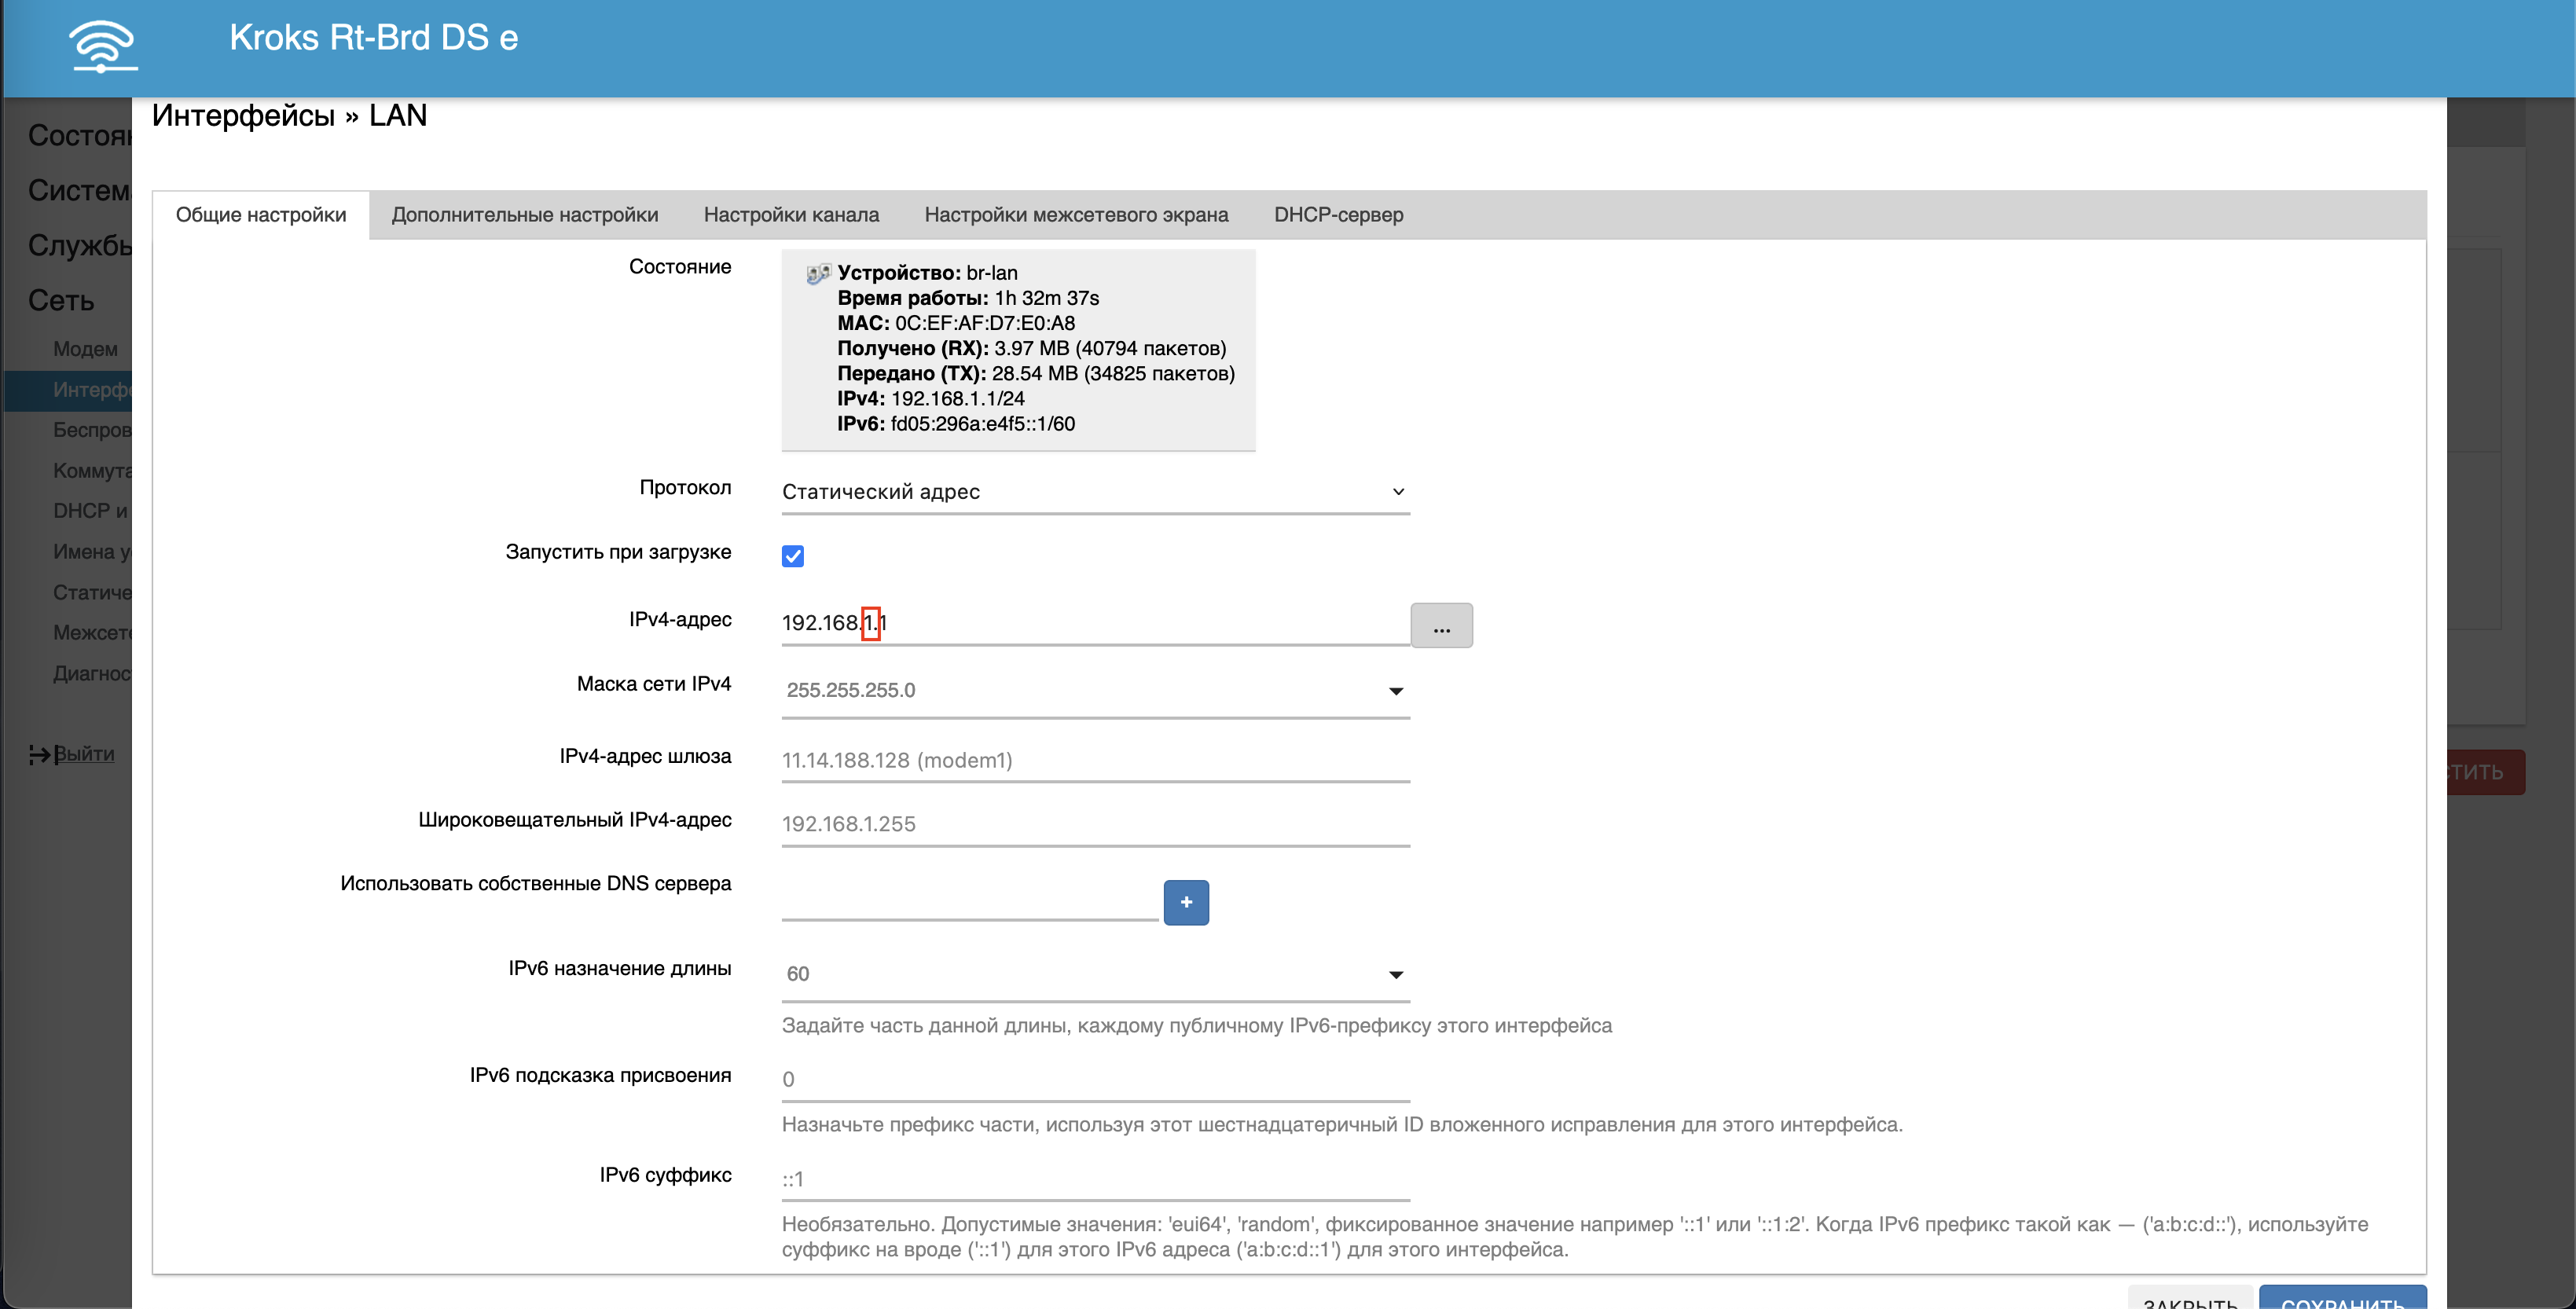
In the interface editing form that opens, find the “IPv4 address” text field and change the IP with a unique subnet. In this case, since the 1st subnet is already occupied, let there be a 2nd one, on the next router there will be a 3rd one, and so on. Don't forget to save the changes.
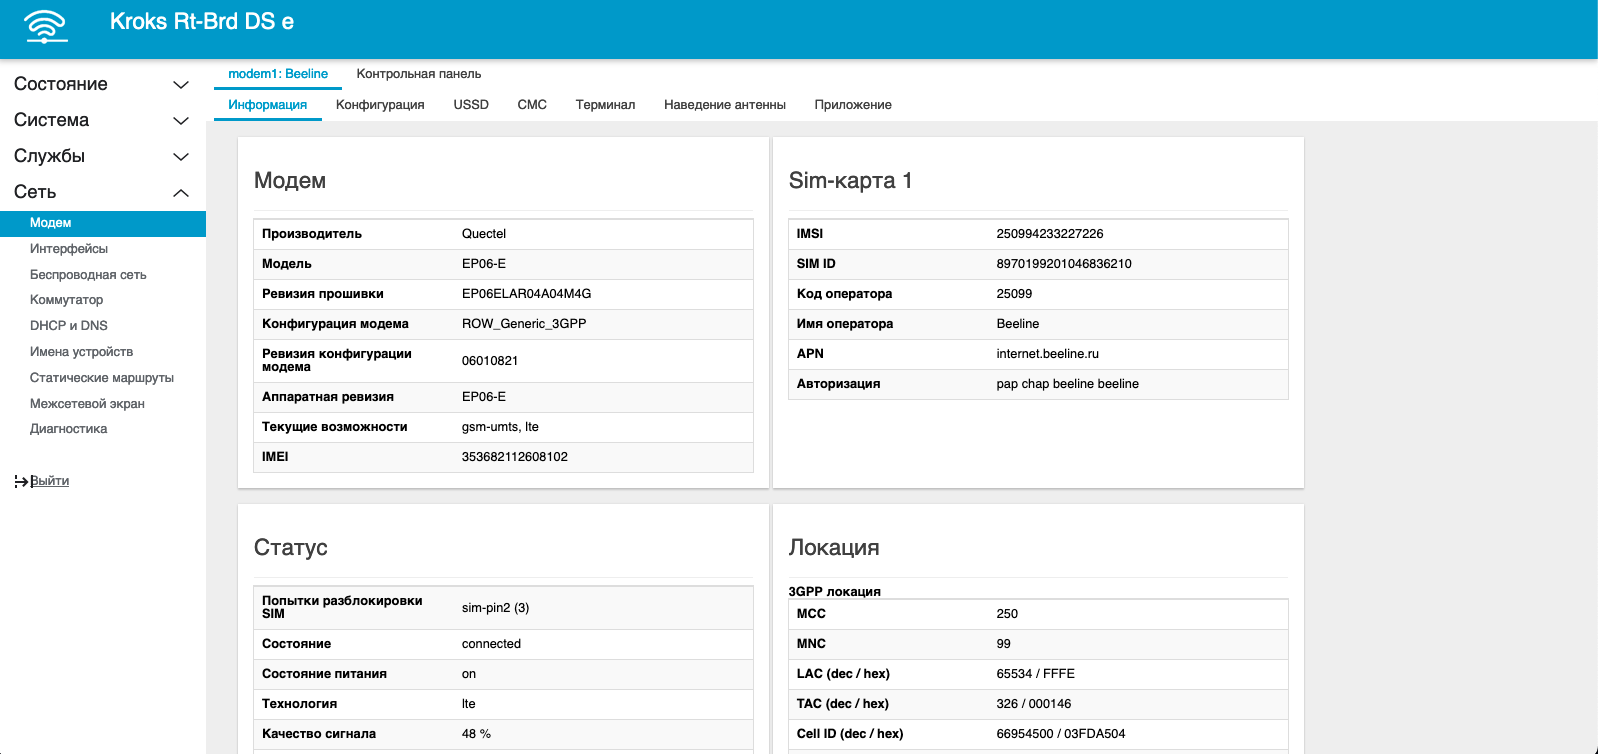
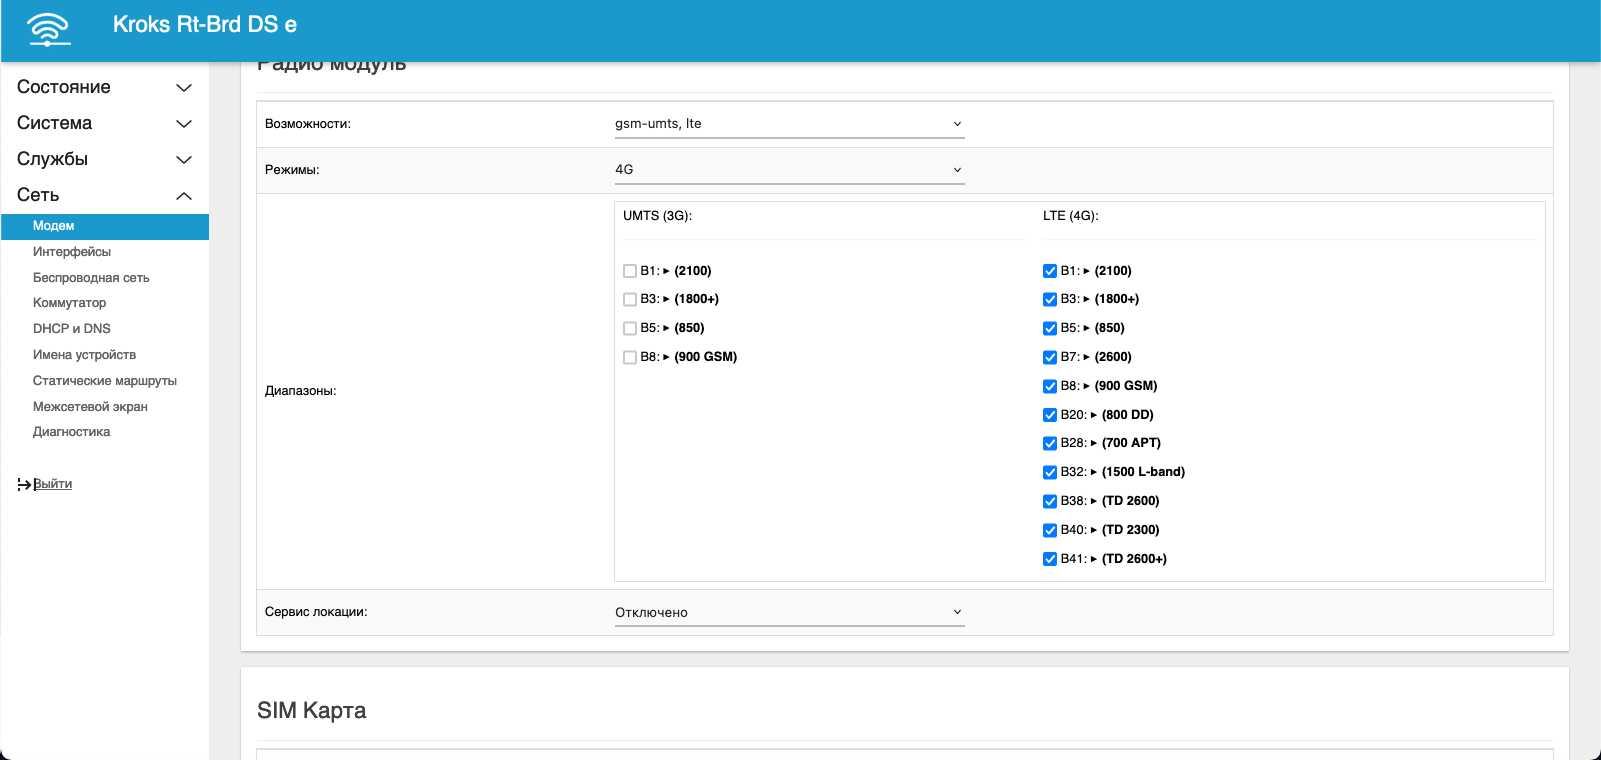
Next, let's go to the “Network->Modem” section and get acquainted with the main parameters of connecting the modem to the operator’s network, such as: modem model, imei, connection status, signal quality, network type, operating frequencies (bends). In our case, the modem uses frequency aggregation at frequencies B3+B7.
In the Configuration tab, we can set the operating mode of the modem, as well as LTE frequencies. This router model has two SIM card slots and can alternately use a SIM card as the main one if one of the conditions is met (loss of Internet availability, by timer).
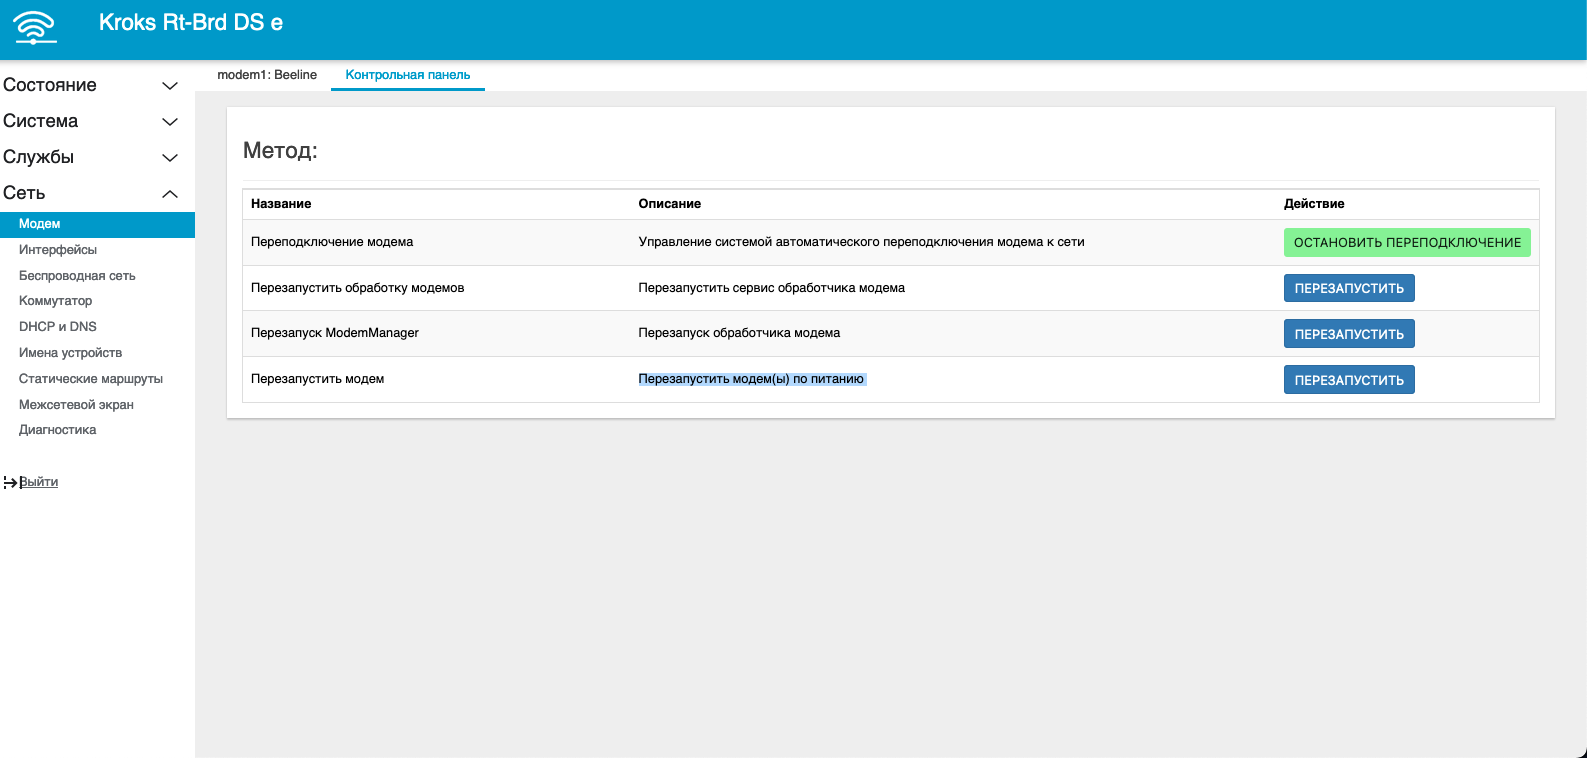
Also in the “Control Panel” tab there are special service functions, one of “Restart the modem(s) on power” uses kraken for the reconnection mode “Reboot the modem”. This function will be useful for those whose operator does not change IP when using other modes.
Having completed all the preliminary settings, we will connect our LTE router to the switch via a 24V Passive PoE injector. This device simultaneously performs the function of power supply and data transmission, which simplifies the installation of the router and reduces the number of connected cables.
Creating a port
Open the “Kraken Proxy” control panel, and go to the “Ports” section, click the add button and in the port creation form, select “Kroks Rt Bdr Ds e” in the “Modem model” field from the drop-down list.
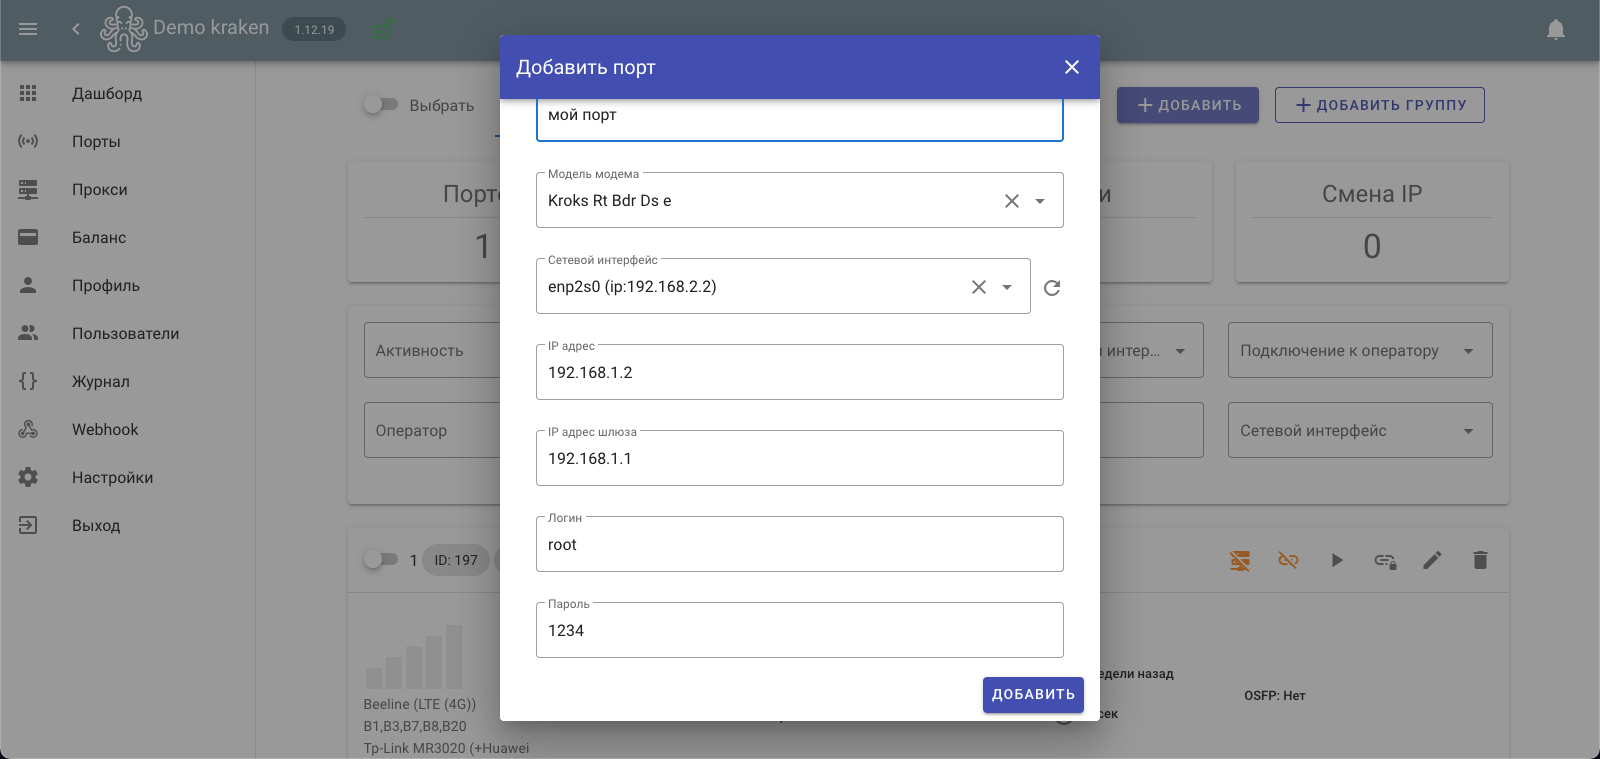
Next, in the “Network Interface” field, you need to select the interface that is connected to the switch. We fill in all the required fields:
- IP addresses – enter an arbitrary IP in the range of our LTE router from 2-254, for example 2;
- The gateway IP address is the IP of the OpenWRT router control panel
- Login - the LTE router control panel, root must be allowed access via ssh
- Password – superuser root.
Then select the required type of IP change (by time, by link, by link and time), and set the “Activity” switch to enabled, click the add button.
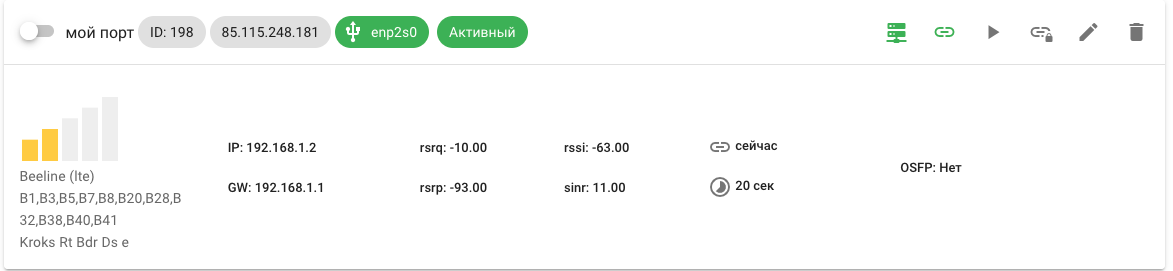
After saving the port, within a few seconds we will have data about the state of the modem and its connection, as well as the current public IP address of the operator.
Creating a proxy profile
Next we can start setting up a proxy server for our port. To do this, let's go to the proxy section and create the required proxy type.
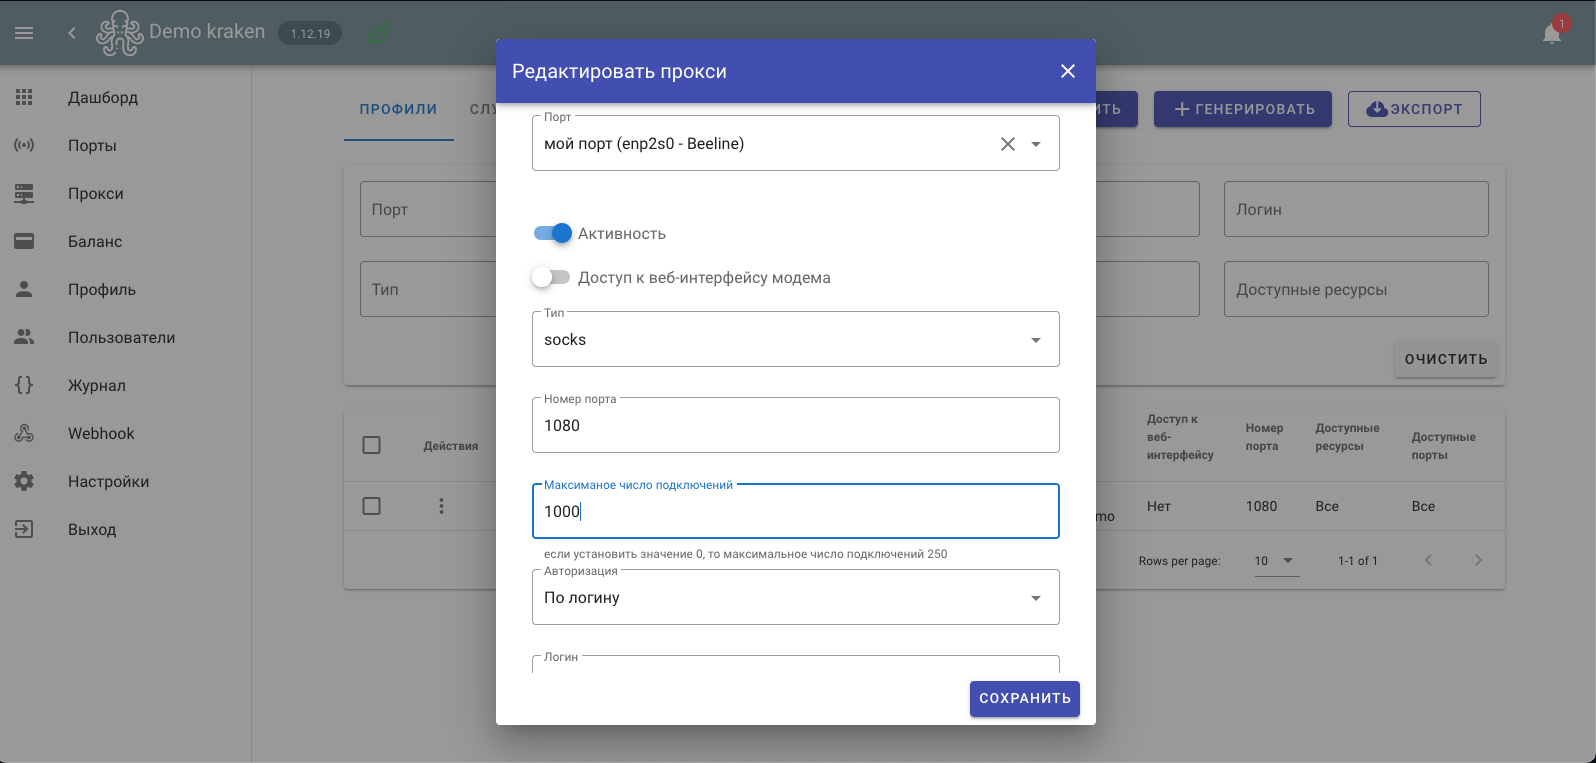
Select our router in the “Port” field, set the “Activity” switch to on, fill in the remaining fields:
- Type - from the drop-down list, proxy type for example “Socks”.
- Port number - specify an arbitrary port number through which we will connect to our proxy.
If you need a remote connection, you also need to forward the port on the router (the IP address must be static, you cannot connect from outside to yourself. Use another Internet connection to check external access).
- Maximum number of connections – set the number of maximum simultaneous TCP connections to the proxy.
- Authorization – select authorization options for the proxy (by login or IP)
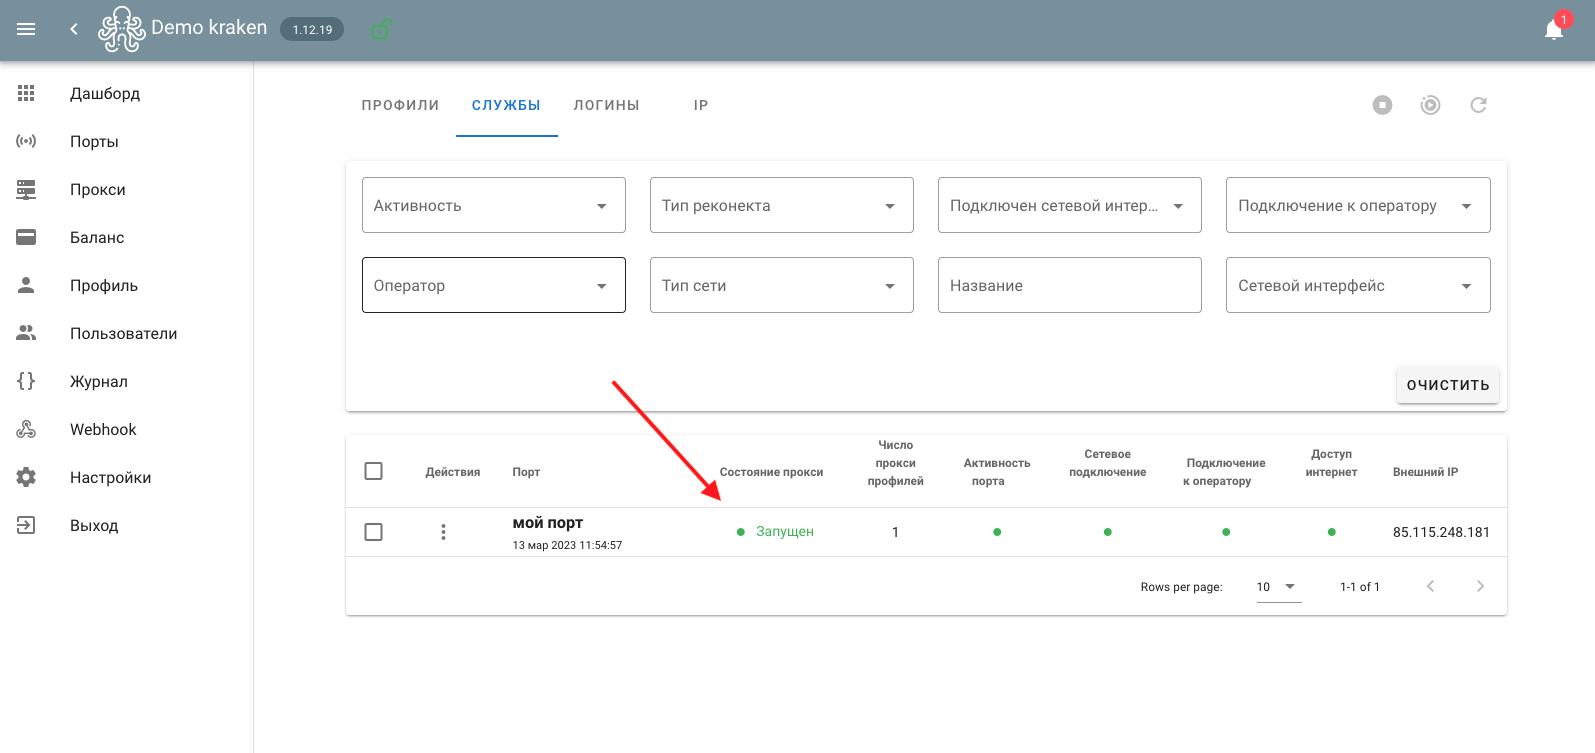
Next, we create a user when choosing authorization by login, and save our proxy profile. Before checking the proxy, go to the “Proxy->Services” section and make sure that the proxy is running successfully.
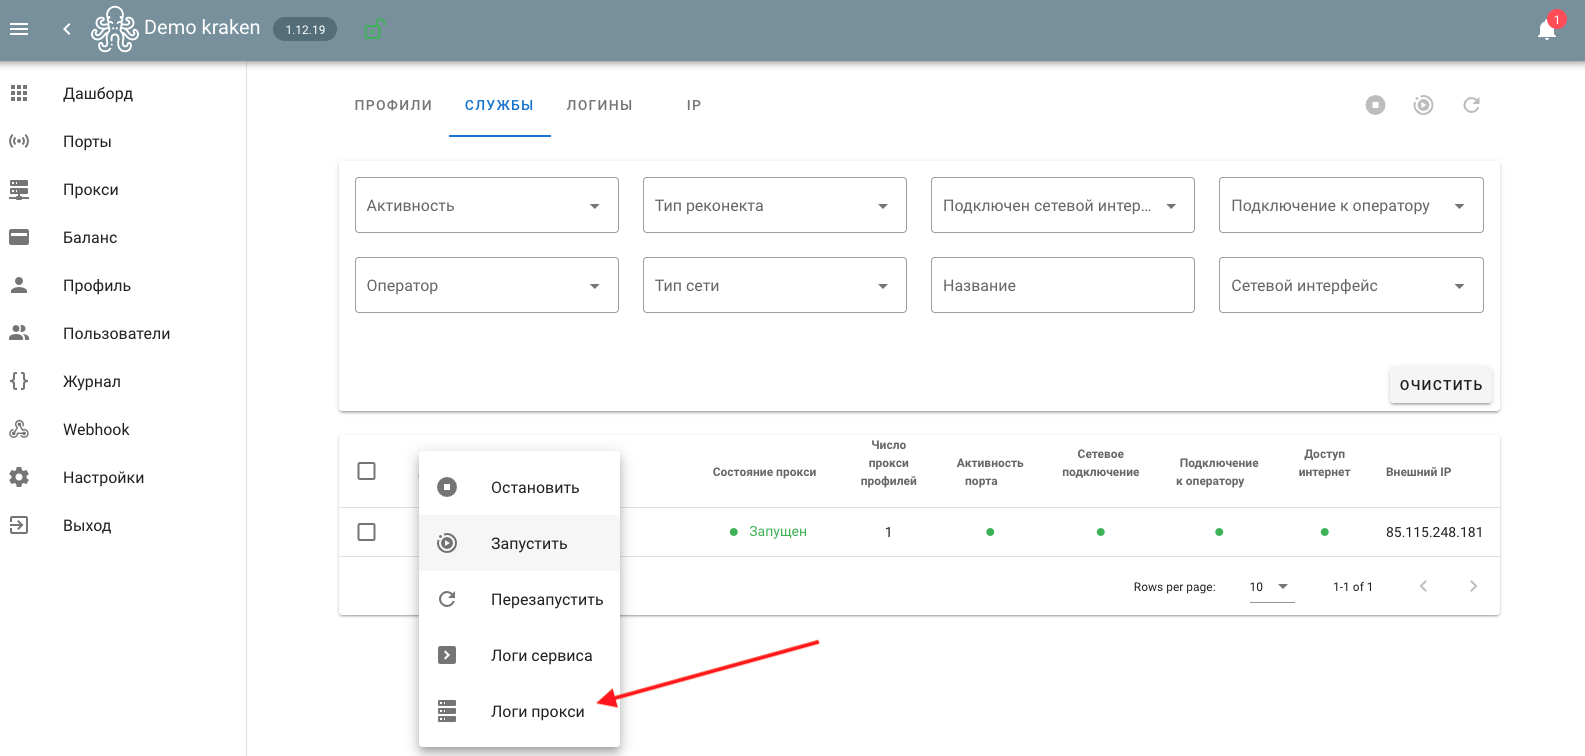
For more detailed information about the proxy status, you can enable logging mode in the general settings, and then resave the proxy profiles.
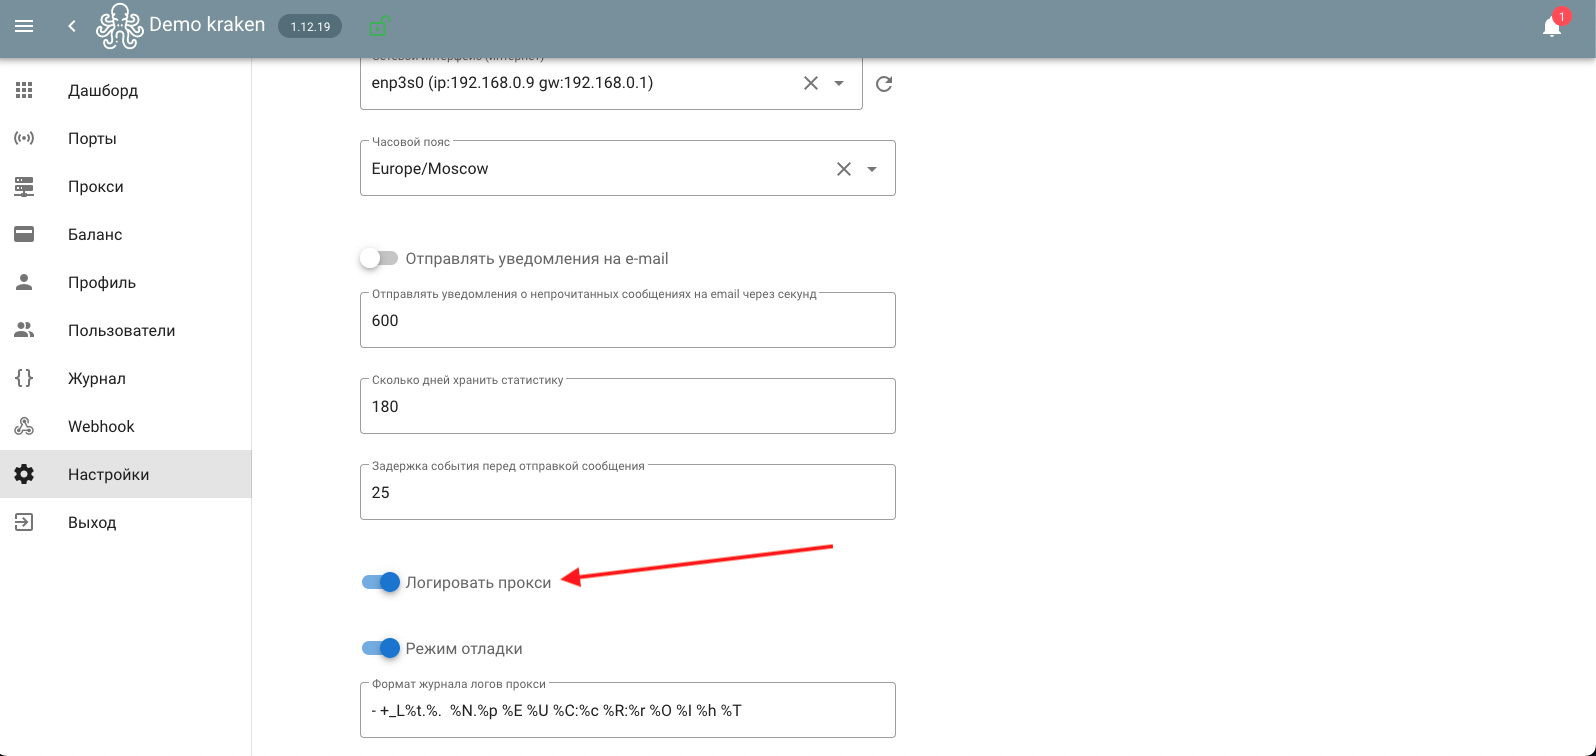
The proxy logs will become available in the “Proxy->Services” section, select “Proxy Logs” in the drop-down menu of the port service.