Mobile proxies on Tp-Link MR 3020 routers
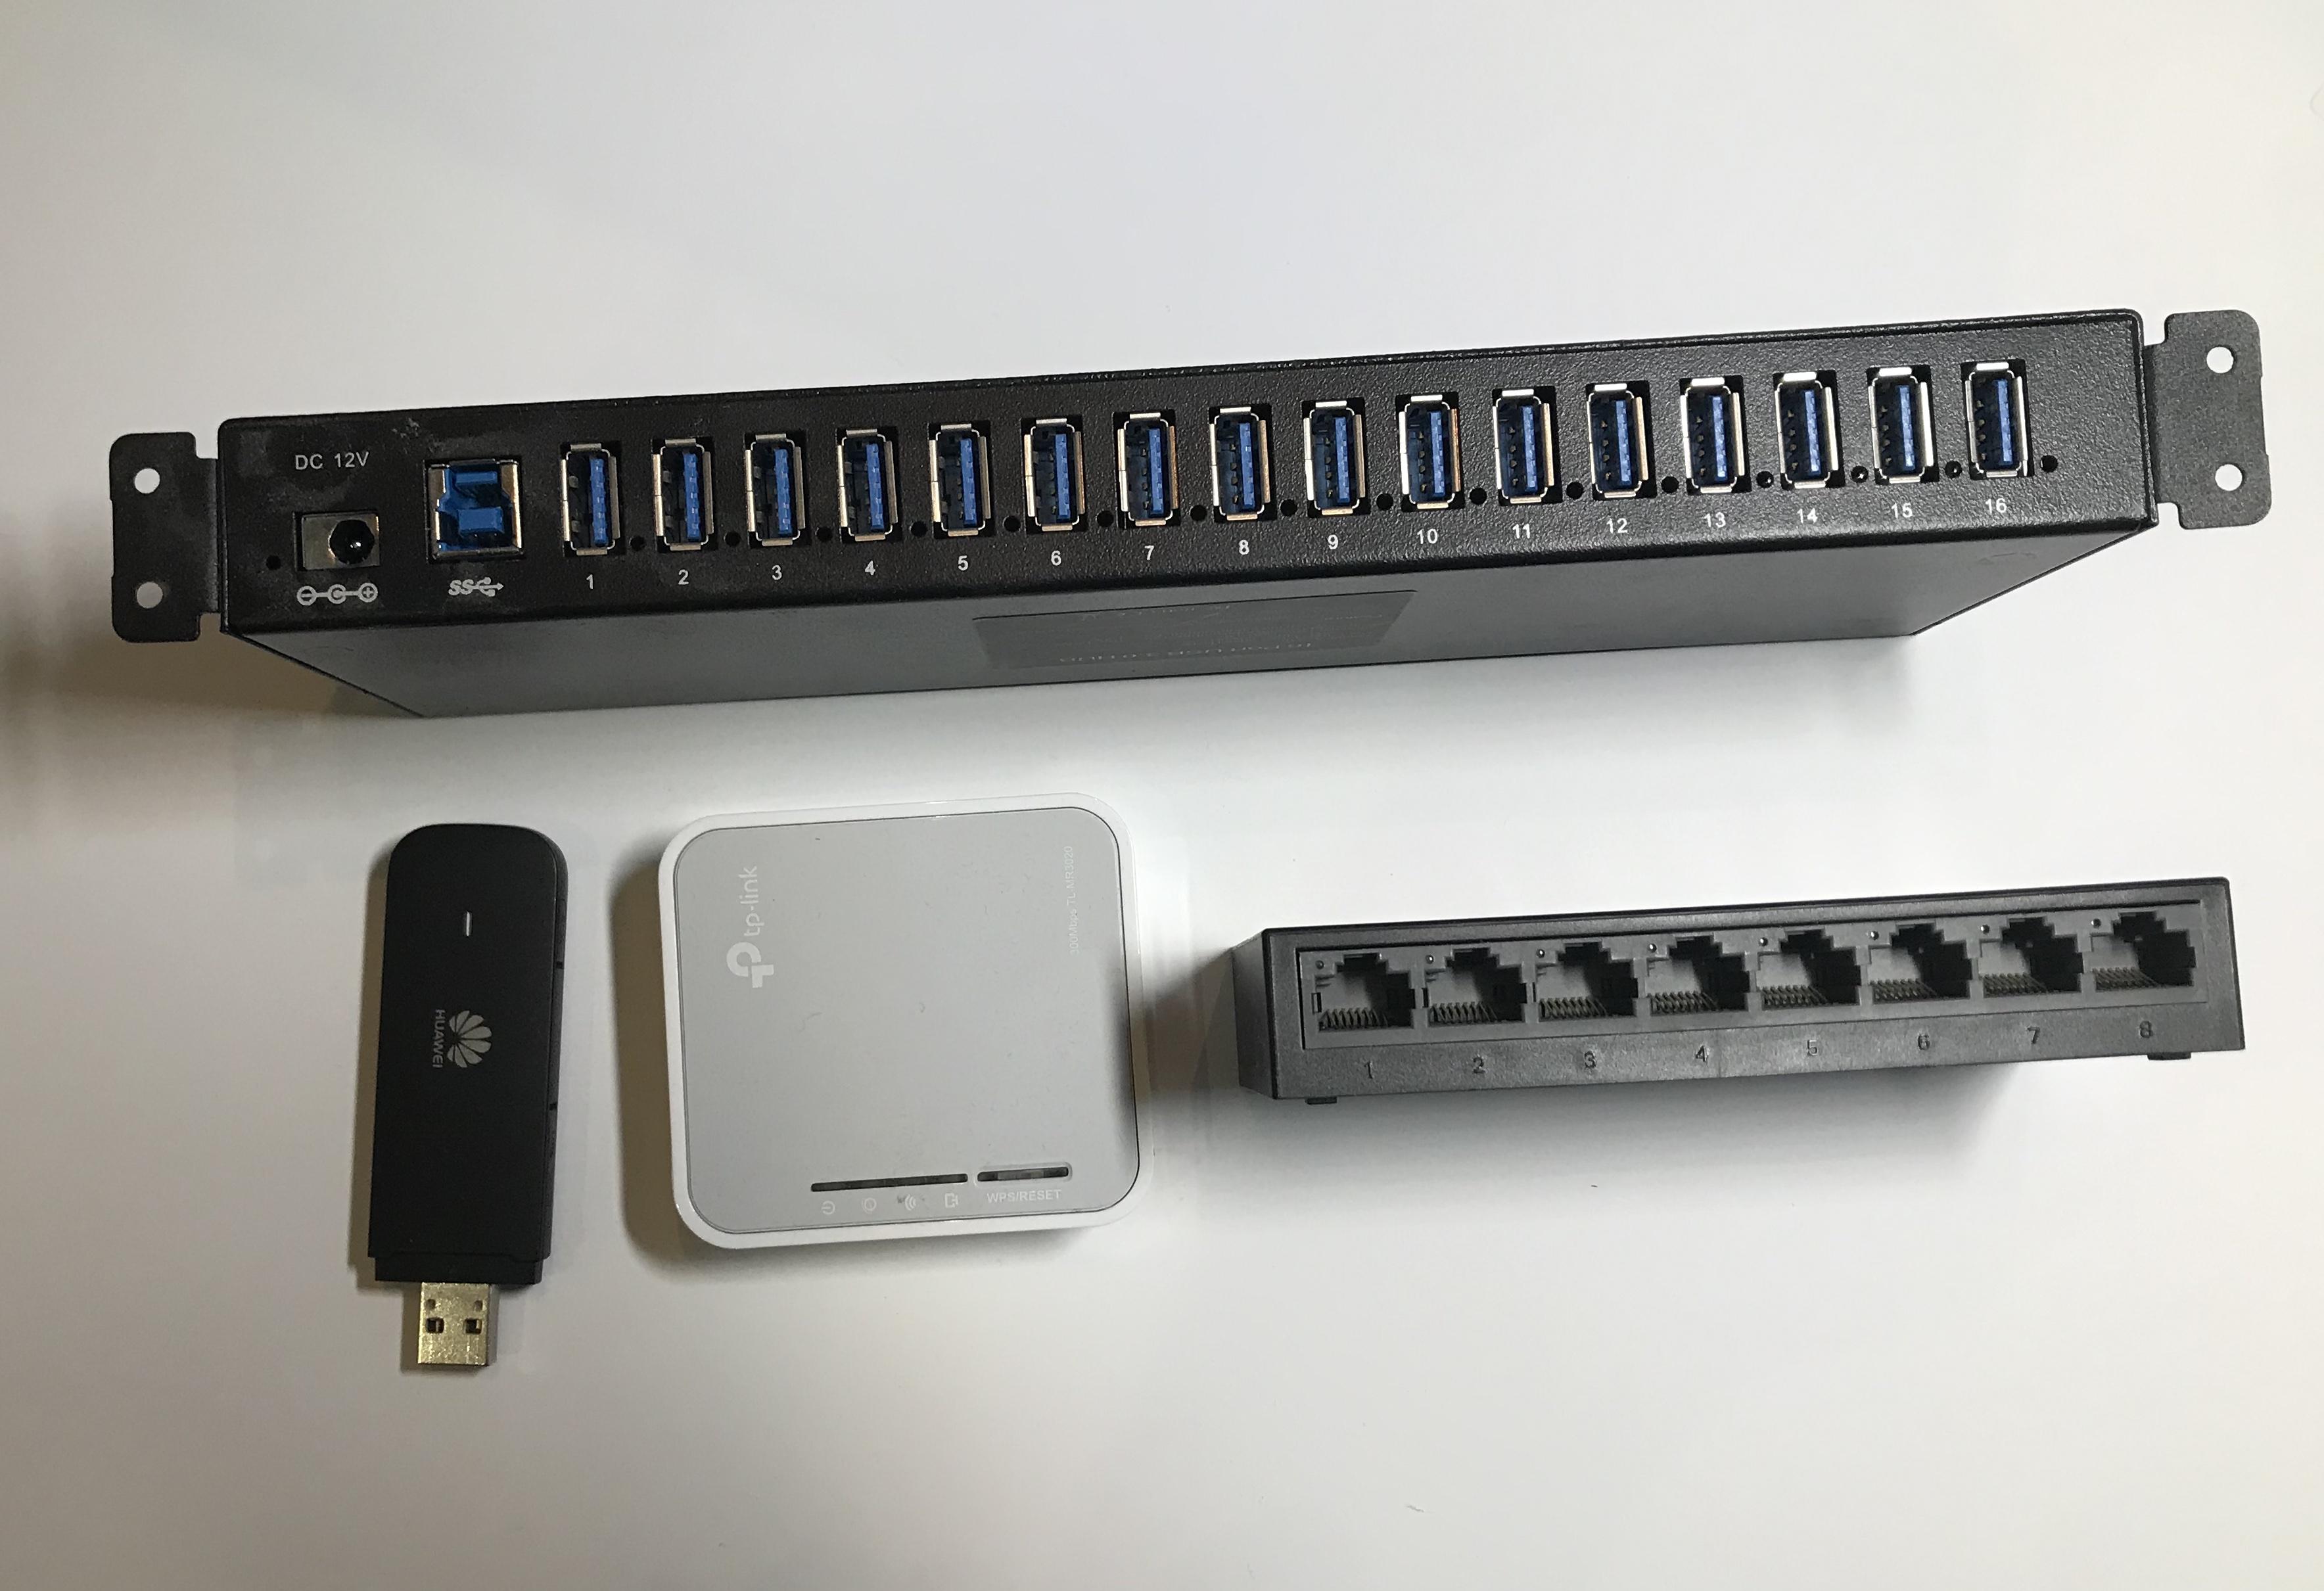
- To organize mobile proxies, we will need:
- Tp-Link MR 3020 router
- USB modem (Huawei E3372h-153, Huawei E3372h-320, ZTE MF833R)< /li>
- Unmanaged or managed network switch
- Server with two network cards
- Router with cable Internet connection
- USB power supplies or hub (for Tp-Link MR 3020)
The connection diagram itself looks like this.
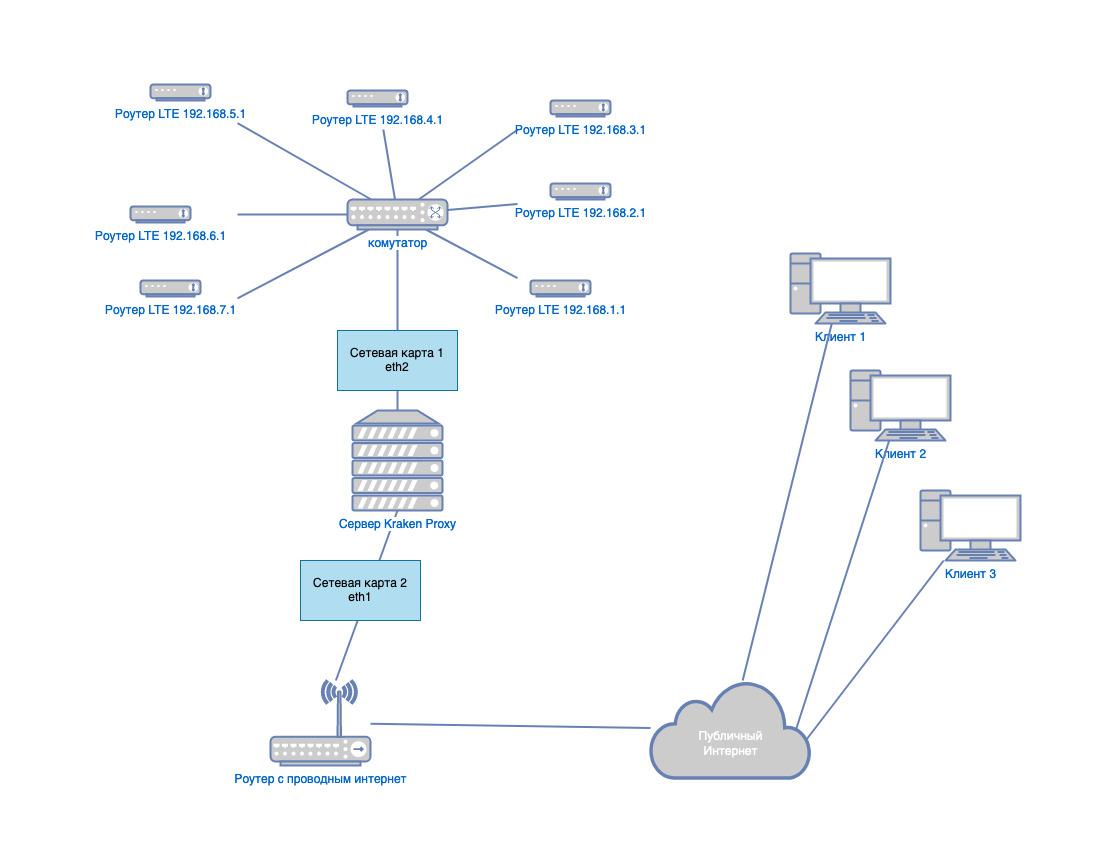
The first network card of the server is connected to the switch, routers are also connected to the same switch, but you must first set different IP addresses. Each router must have different subnets in the format 192.168.x.1, where x is a subnet that should not be the same as the wired Internet or other modems to prevent network conflict. There is no need to change the IP address on the modem. The second network interface of the server is connected to the router with wired Internet.
If you are going to provide remote access to a proxy, then you needdedicated(static) IP address and “forwarding” proxy ports on the router.
Firmware and configuration of the Tp-Link MR 3020 router
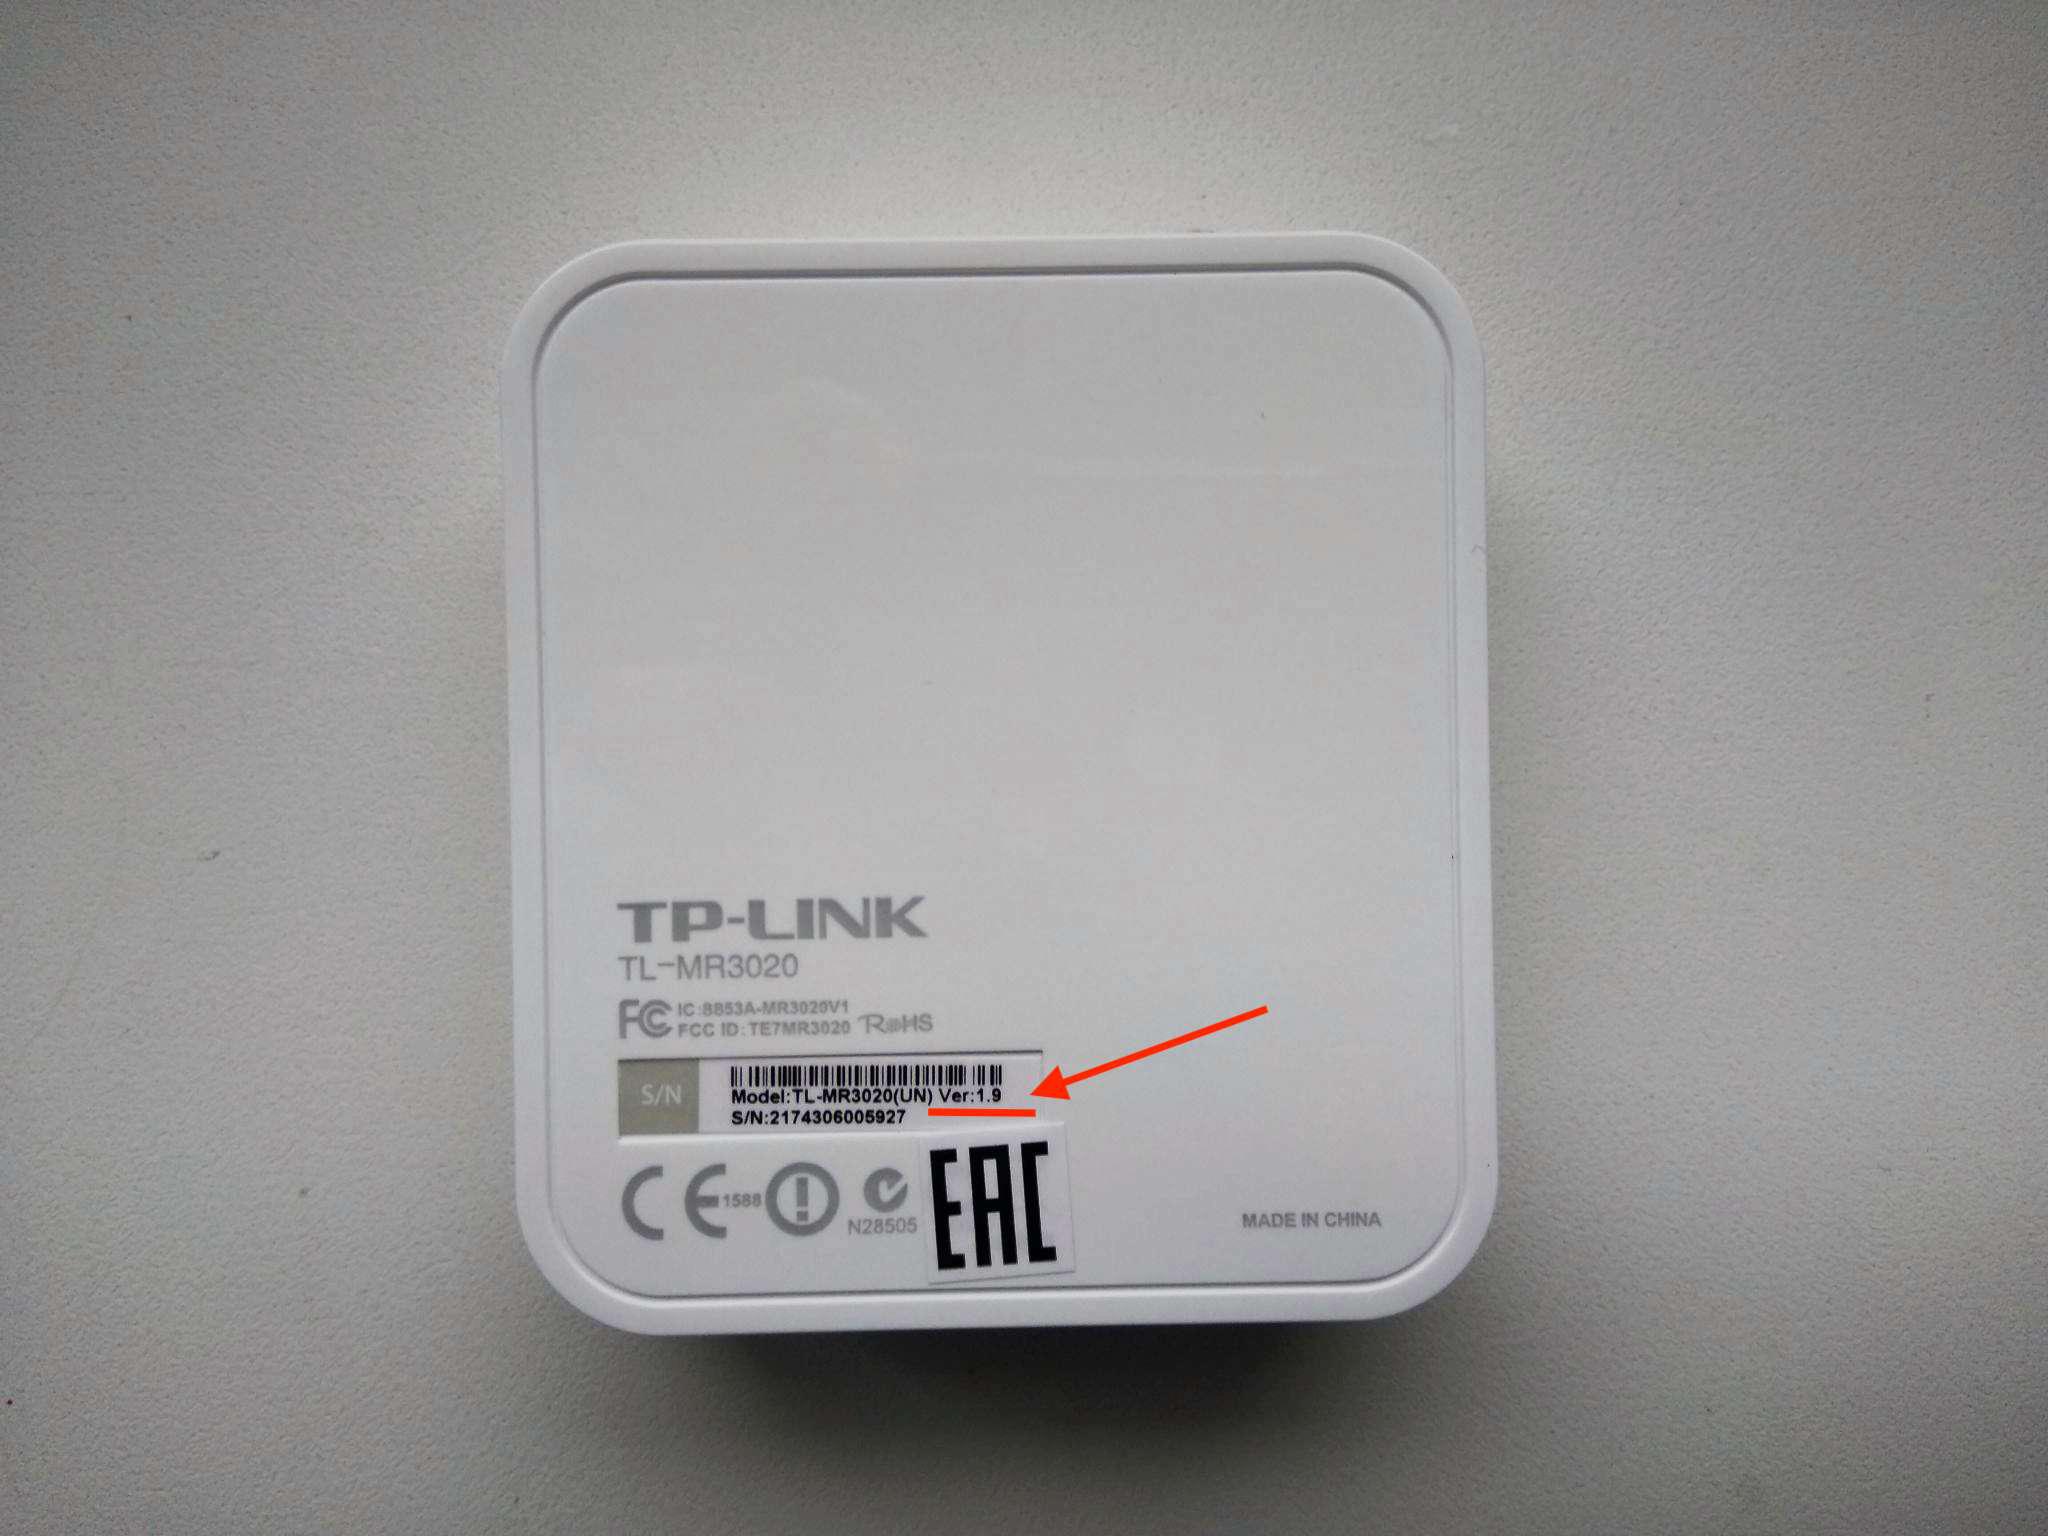
Before connecting the router, we need to flash the firmware on OpenWRT and install add-ons for working with the modem and server. To select the required firmware, you need to find out the hardware version of the router; this can be determined on the sticker with the serial number of the back cover. Today there are two modifications: version 1 (v1.x) and version 3 (v3.x)
Next, we find and download the assembly with the necessary modules for working with usb modems from the site 4pda. This article will discuss the 3rd version of mr3020, with firmware 18.06.1.
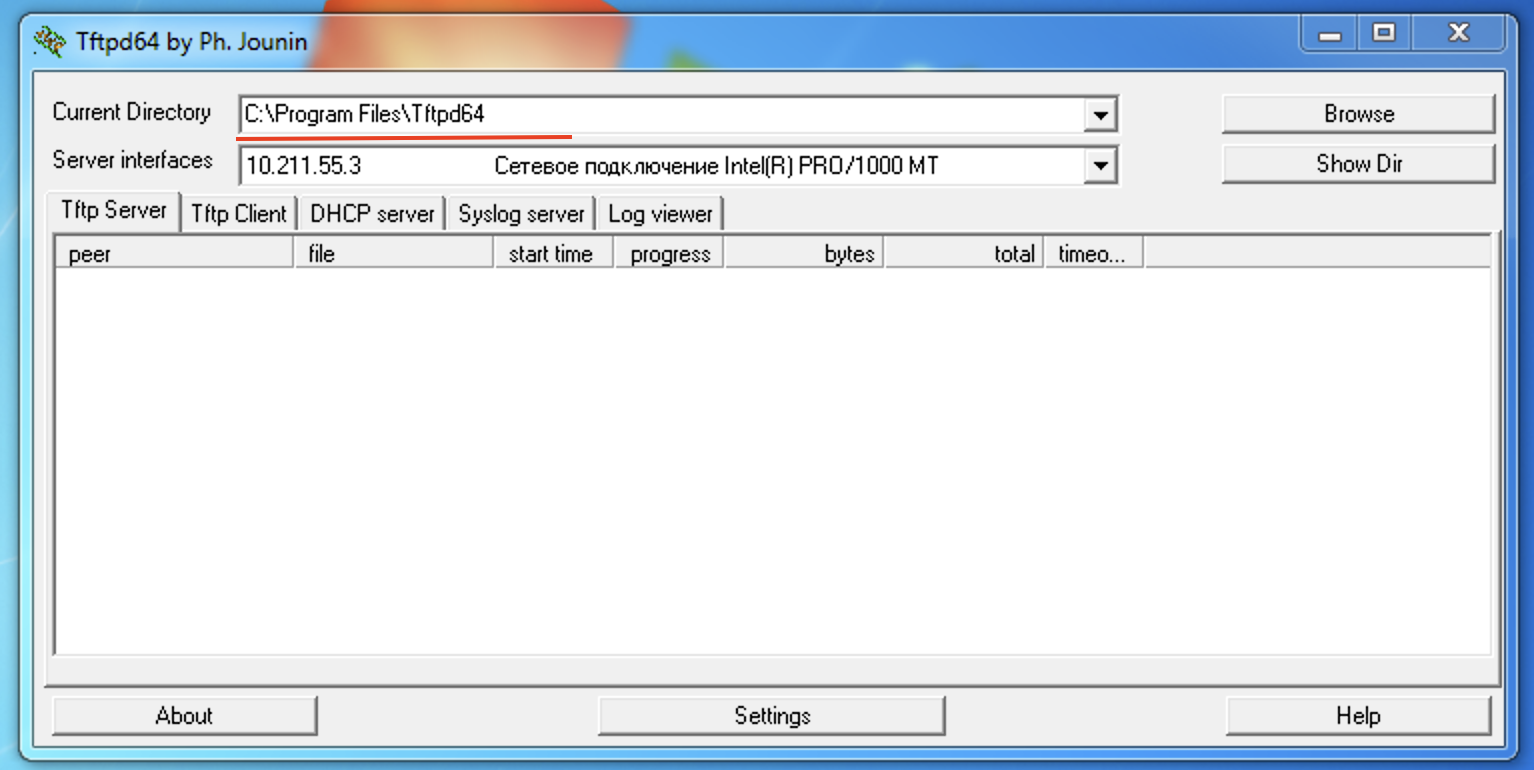
Download the TFTP server from the link http://tftpd32.jounin.net, after Then we connect the router to the PC via a cable to the network card and set the IP address 192.168.0.225 in the card settings.

Unpack the archive with the firmware and transfer the file “openwrt-ramips-mt76x8-tplink_tl-mr3020-v3-squashfs-tftp-recovery.bin” to the tftp server folder “C:\Program Files\Tftpd64" and rename to "tp_recovery.bin".
- Starts the tftp server
- Turn off the power to the router
- Press the “Reset” button
- Turn on the power to the router
- Hold the button “Reset” until the download information appears in the tftp server window
After successful firmware, we change the network settings of our PC to automatically assign an IP.
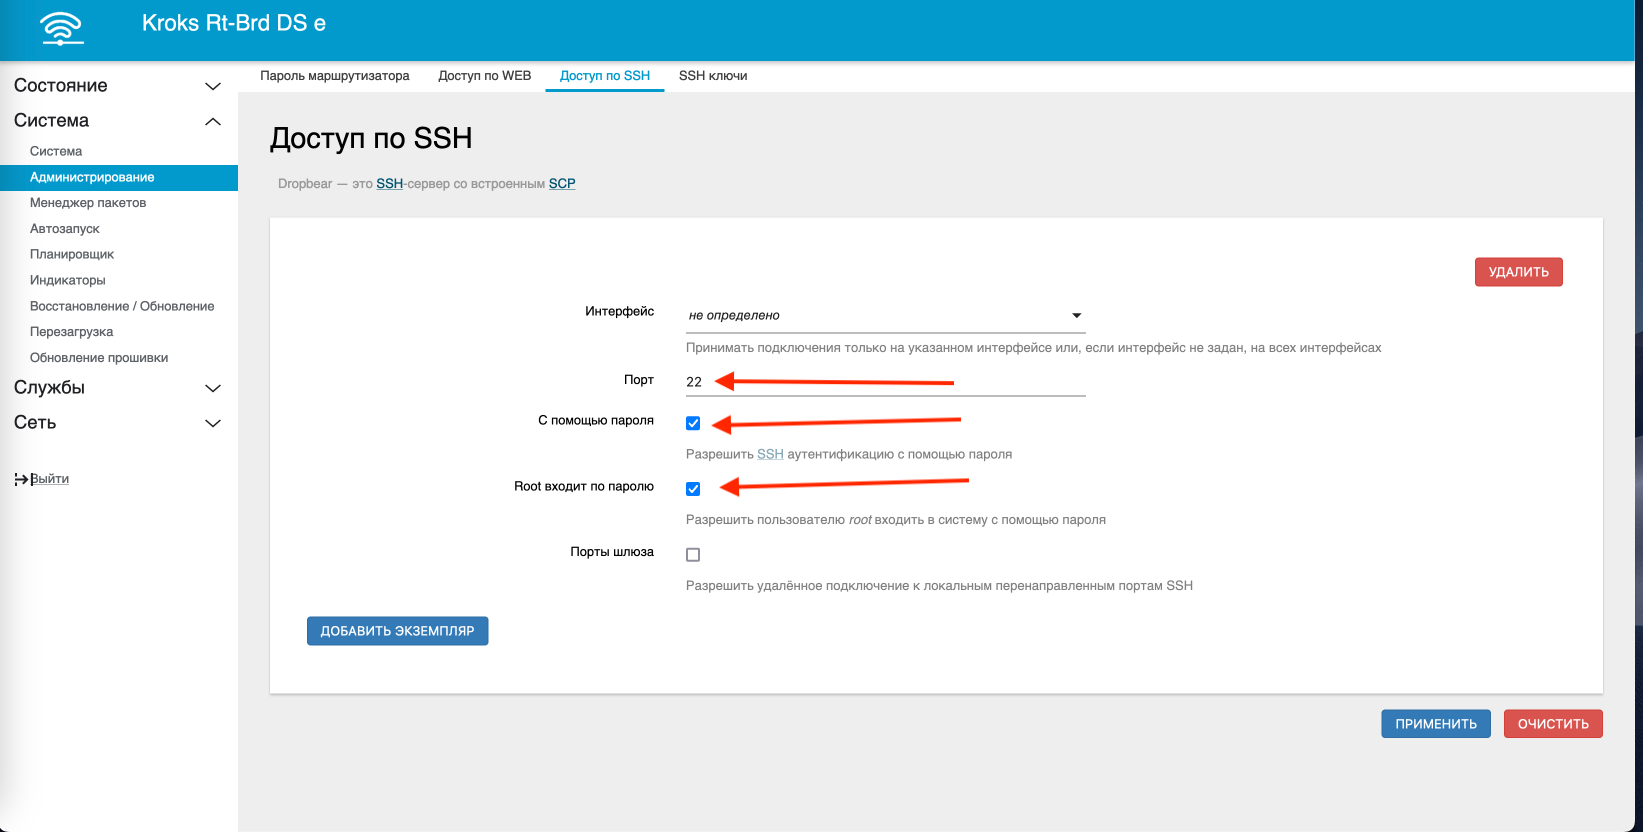
The next step is to connect the modem to the router and configure it to work as a port managed by “Kraken Proxy”. Go to the router's control panel (default address http://192.168.1.1). When you first log in, OpenWrt will ask you to set the administrator password (root user), you can also set the password in the "System->Administration->Administrator Password" section. Next, we need to allow access via ssh under the root user using a password, check the necessary boxes, and save the settings.
Now we need to connect our modem, to do this, go to the “Network->Interfaces” section and click the “Add new interface” button.
- Name of the new interface– specify the custom name of the interface name (for example, 4G)
- Protocol of the new interface– select “DHCP client”
- Enable the following interface – select “eth1”

Click the “Apply” button. Go to the “Firewall Configuration” tab and in the “Create / assign firewall zonea” field, select the “wan” zone, click save and apply.

Now you need to install the “CURL” module, regardless of which version of OpenWRT you are using. To do this, we need to connect via ssh to the router using PuTTY or another ssh client (for MAC and Linux can use the console).
Attention!!! Installation requires an Internet connection, i.e. the modem must have an active SIM card.
opkg update
opkg install curl
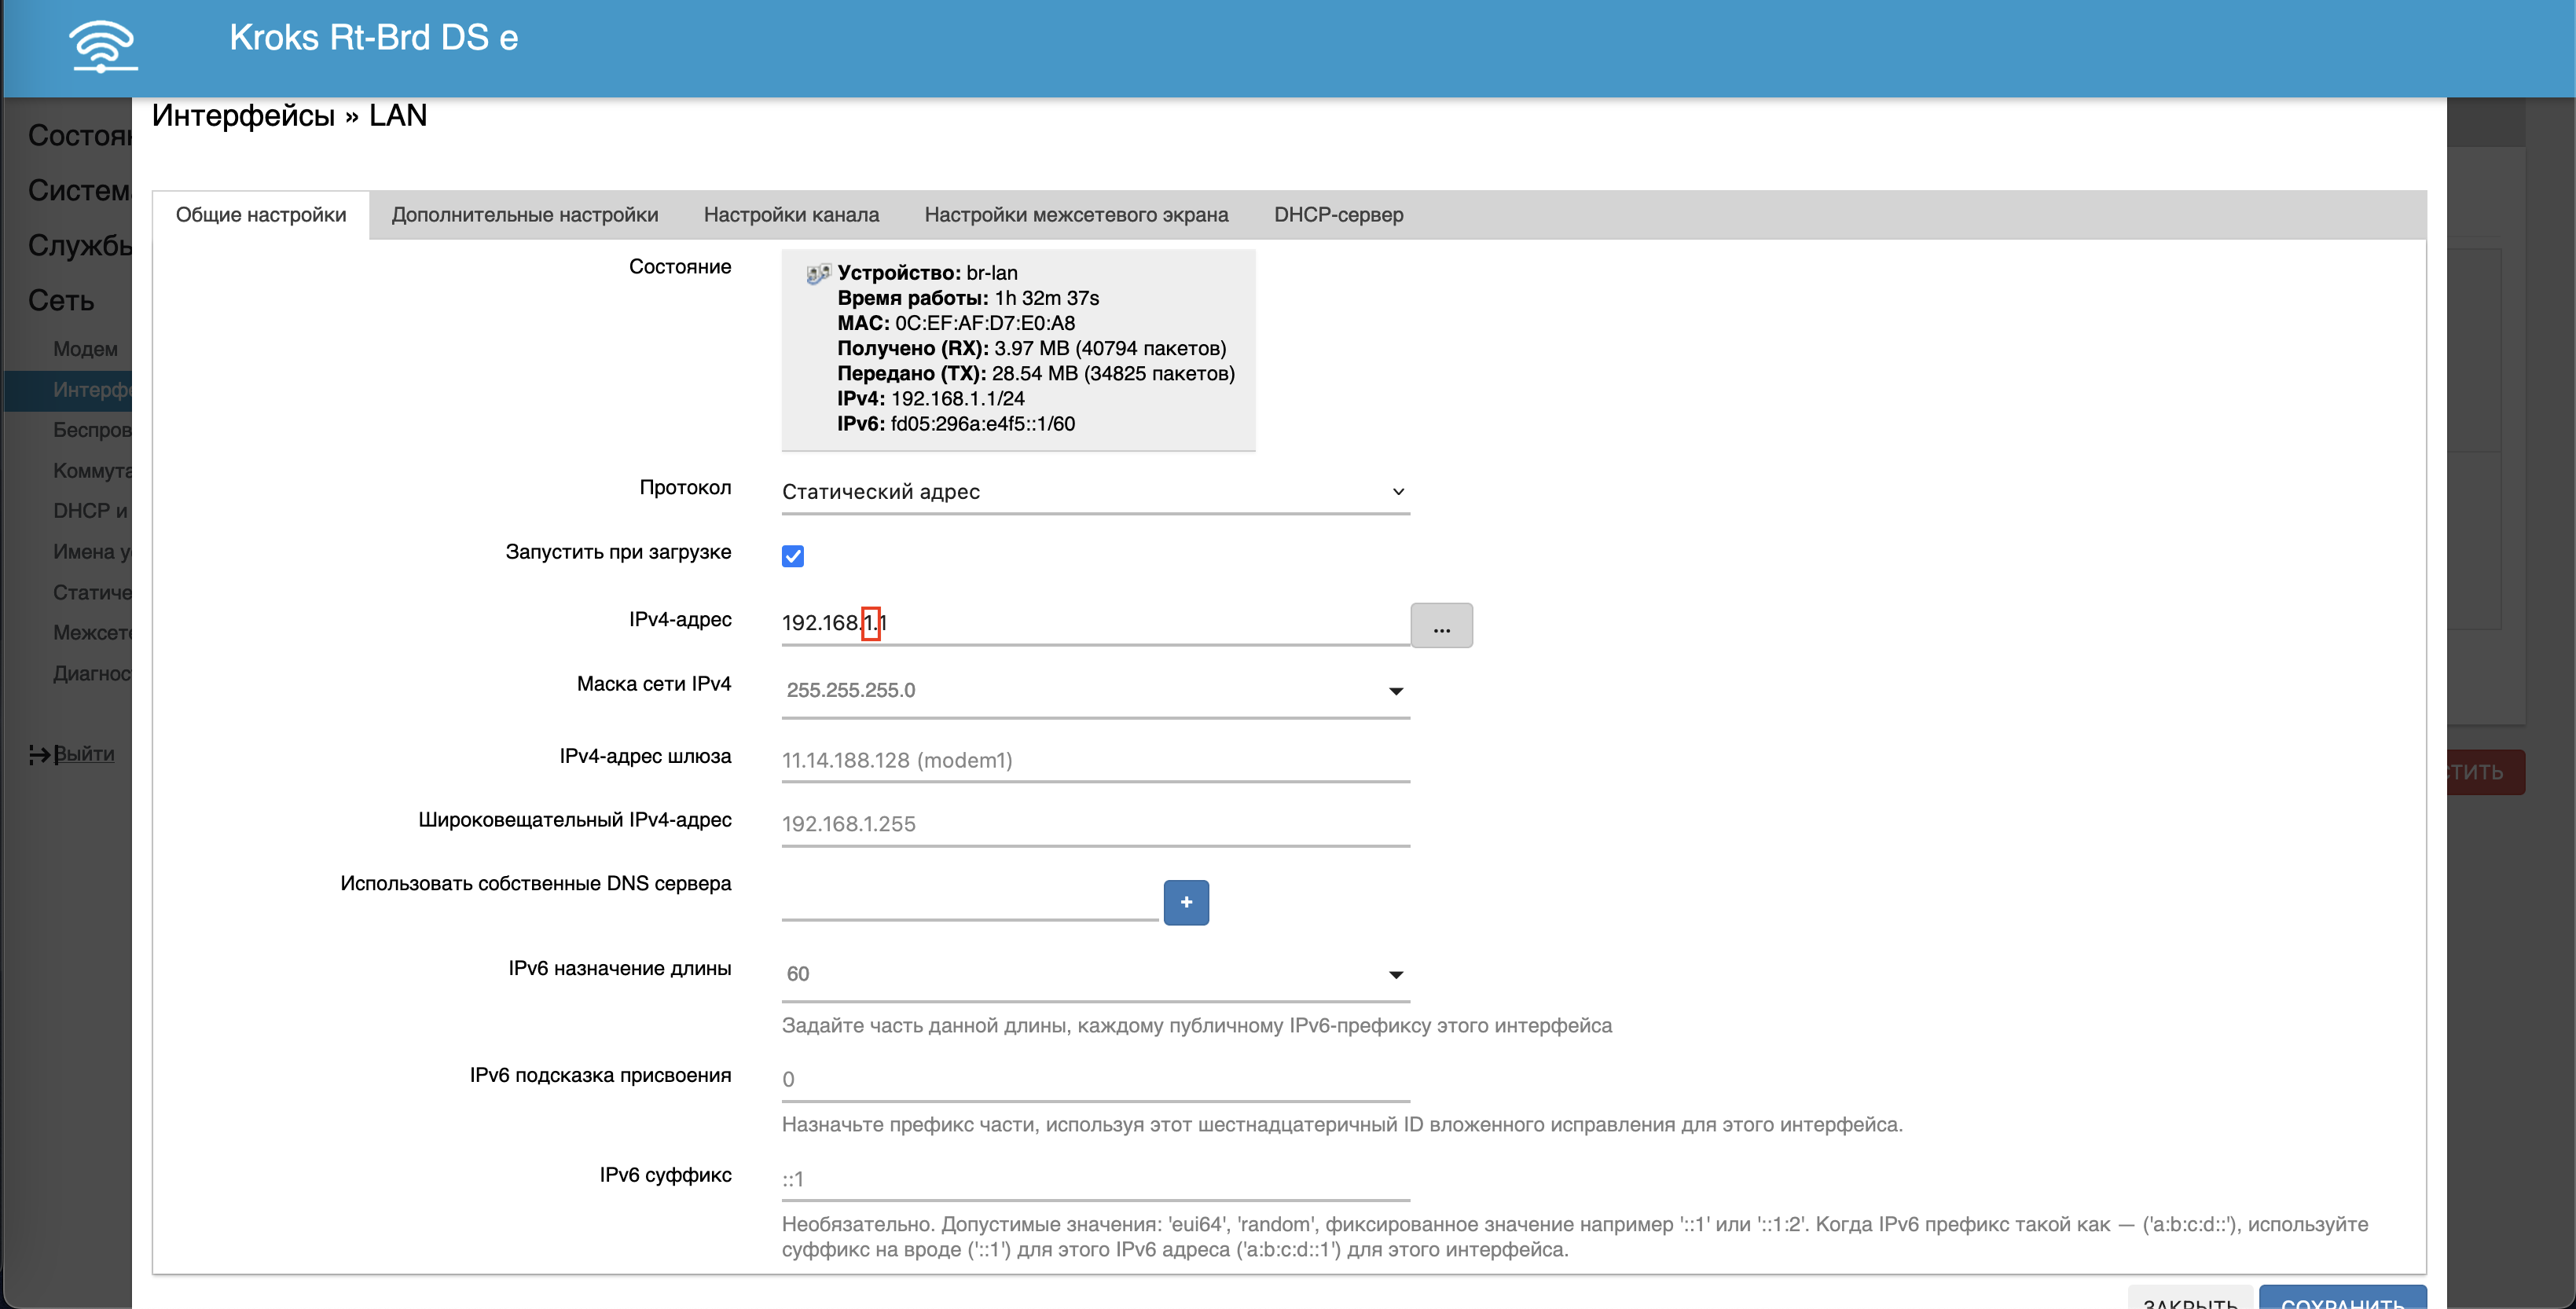
To check the successful installation, enter the command “curl” and if we see the message “curl: try 'curl --help' for more information”, then everything was installed successfully. The next step is to set a unique subnet for the router. To do this, go to the “Network->Interfaces” section and in the “LAN” interface click the change button.
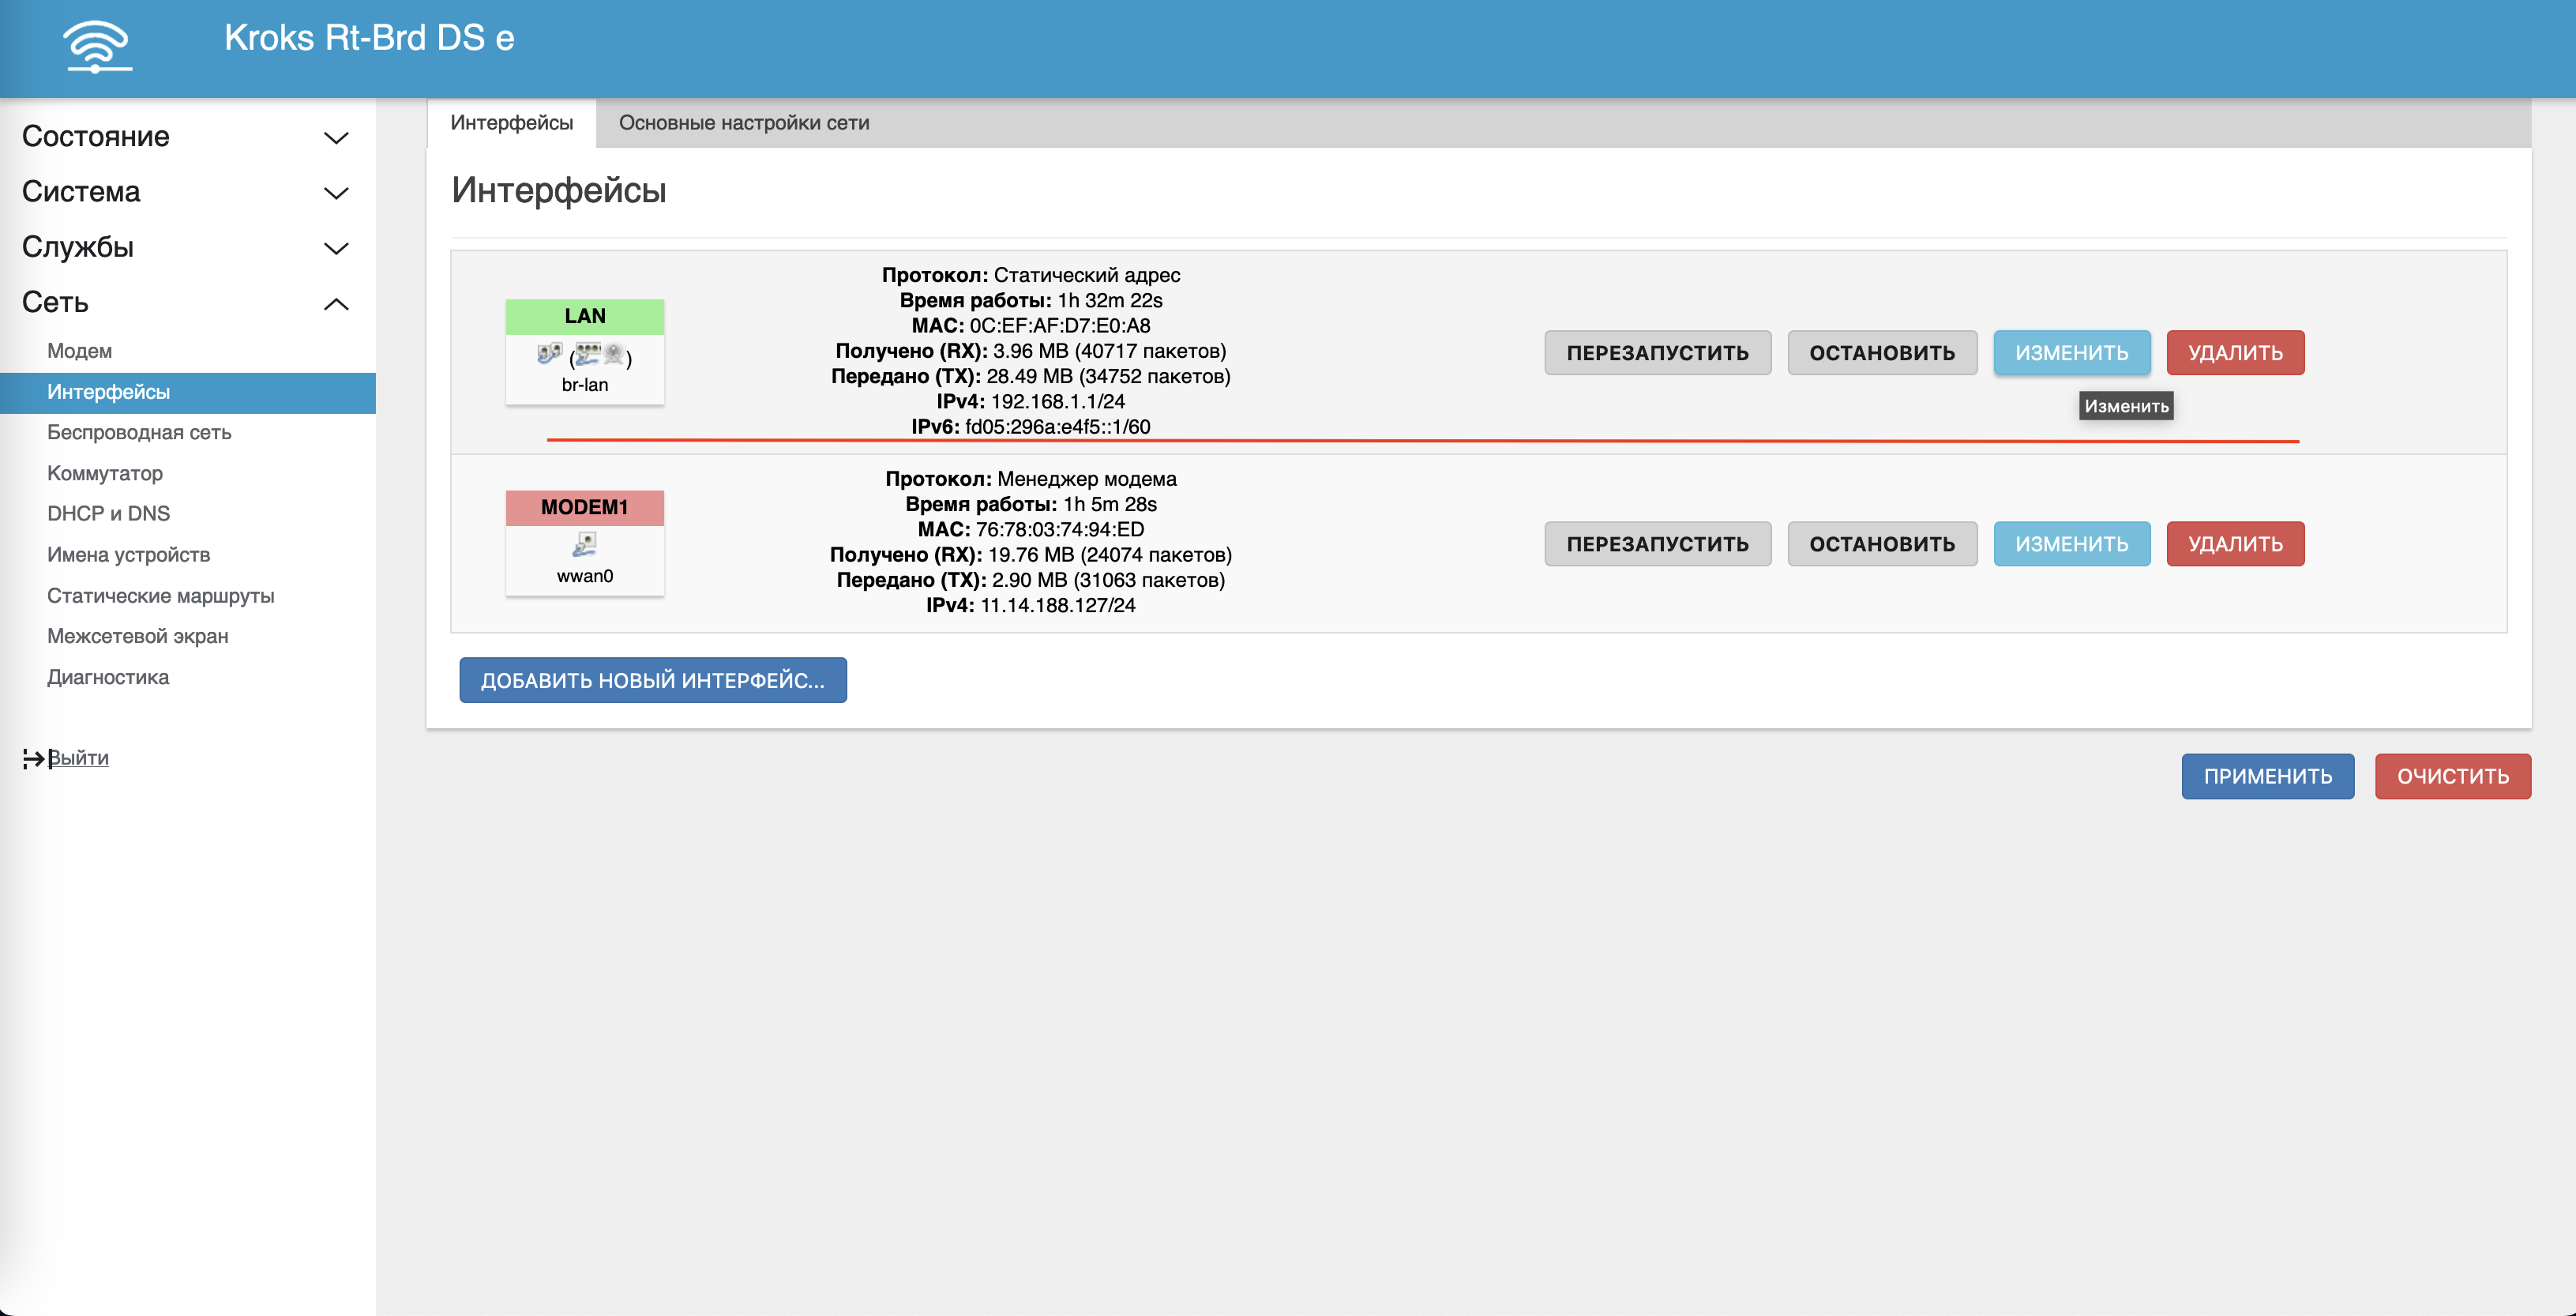
In the interface editing form that opens, find the “IPv4 address” text field and change the IP with a unique subnet. In this case, since the 1st subnet is already occupied, let there be a 2nd one, on the next router there will be a 3rd one, and so on. Don't forget to save the changes.
Having completed all the preliminary settings, connect the MR3020 to the switch and to the power supply.
Creating a port
Open the “Kraken Proxy” control panel, and go to the “Ports” section, click the add button and in the port creation form, select “Tp-Link MR3020 (+Huawei E3372h-320)” in the “Modem model” field from the drop-down list ".
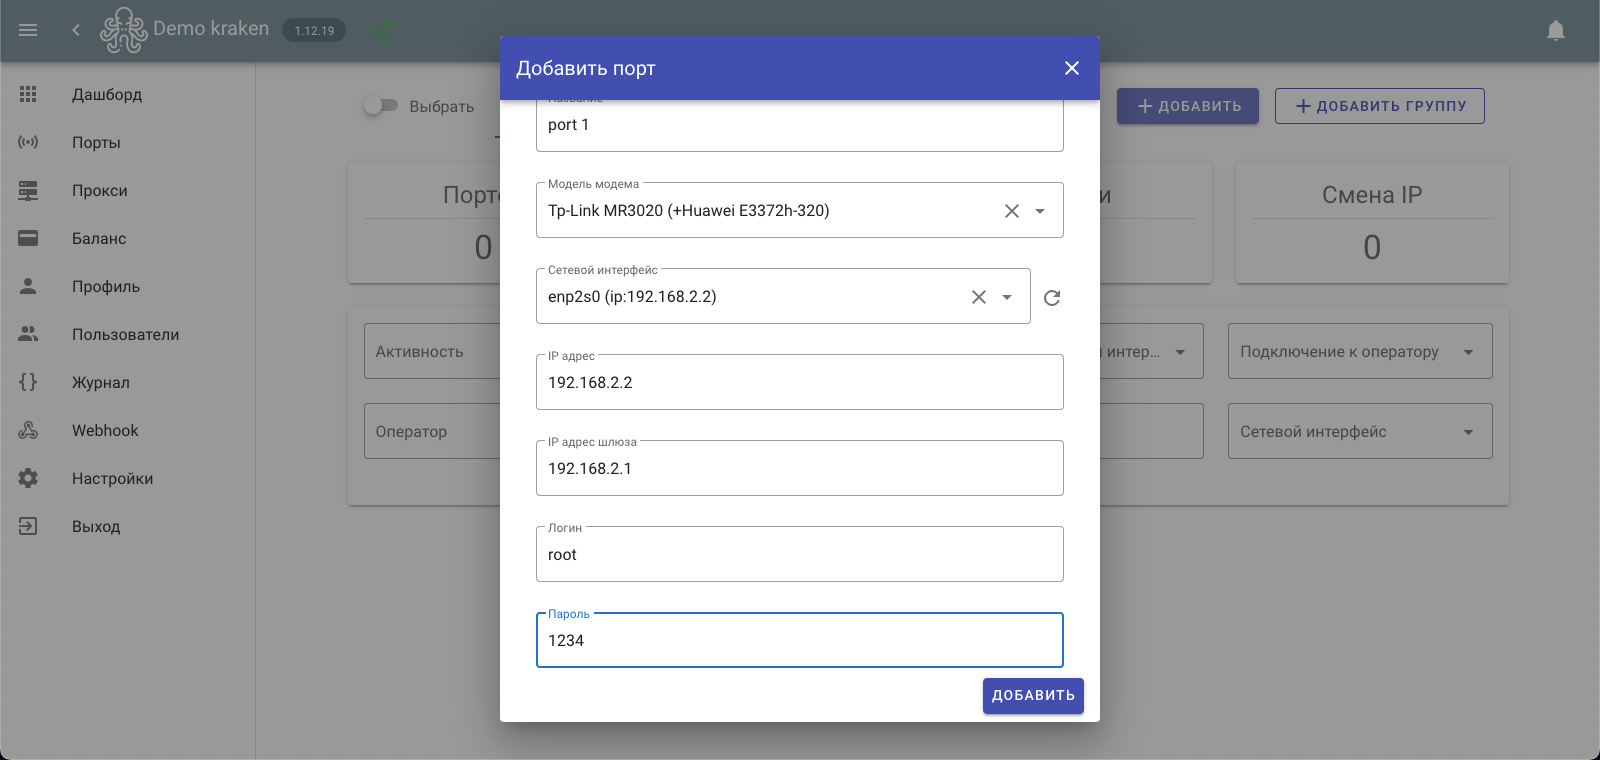
Next, in the “Network Interface” field, you need to select the interface that is connected to the switch. We fill in all the required fields:
- IP addresses – enter an arbitrary IP in the range of our LTE router from 2-254, for example 2;
- The gateway IP address is the IP of the OpenWRT router control panel
- Login - the LTE router control panel, root must be allowed access via ssh
- Password – root superuser.
Then select the required type of IP change (by time, by link, by link and time), and set the “Activity” switch to on, click the add button.
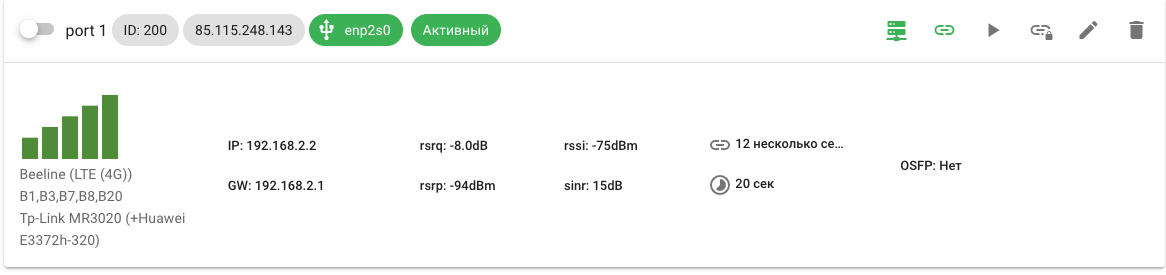
After saving the port, within a few seconds we will have data about the state of the modem and its connection, as well as the current public IP address of the operator.
Creating a proxy profile
Next we can start setting up a proxy server for our port. To do this, let's go to the proxy section and create the required proxy type.
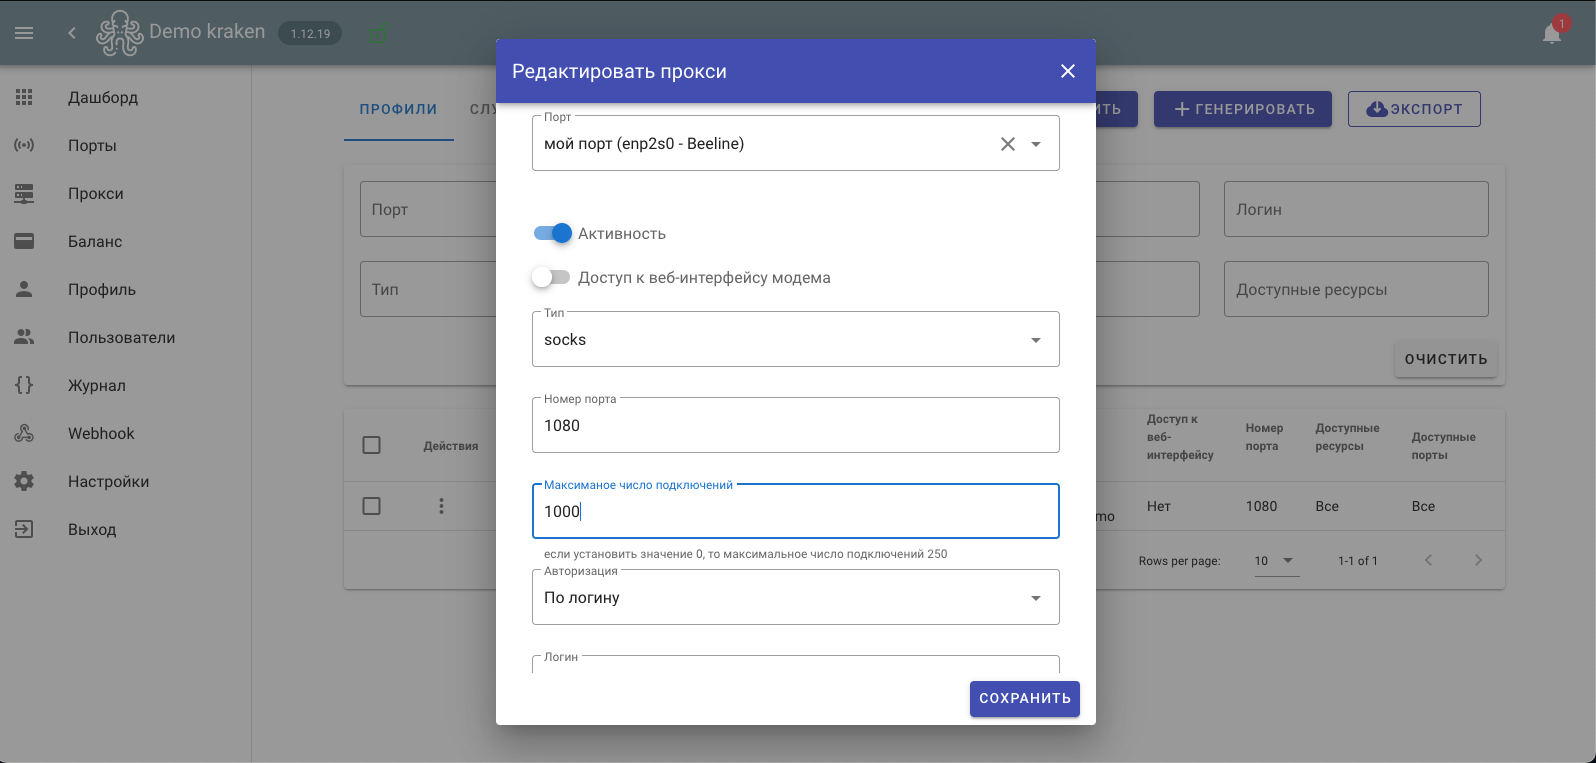
Select our router in the “Port” field, set the “Activity” switch to on, fill in the remaining fields:
- Type - from the drop-down list, proxy type for example “Socks”.
- Port number - specify a random port number through which we will connect to our proxy.
If you need a remote connection, you also need to forward the port on the router (the IP address must be static, you cannot connect from outside to yourself. Use another Internet connection to check external access).
- Maximum number of connections – set the number of maximum simultaneous TCP connections to the proxy.
- Authorization – select authorization options for the proxy (by login or IP)
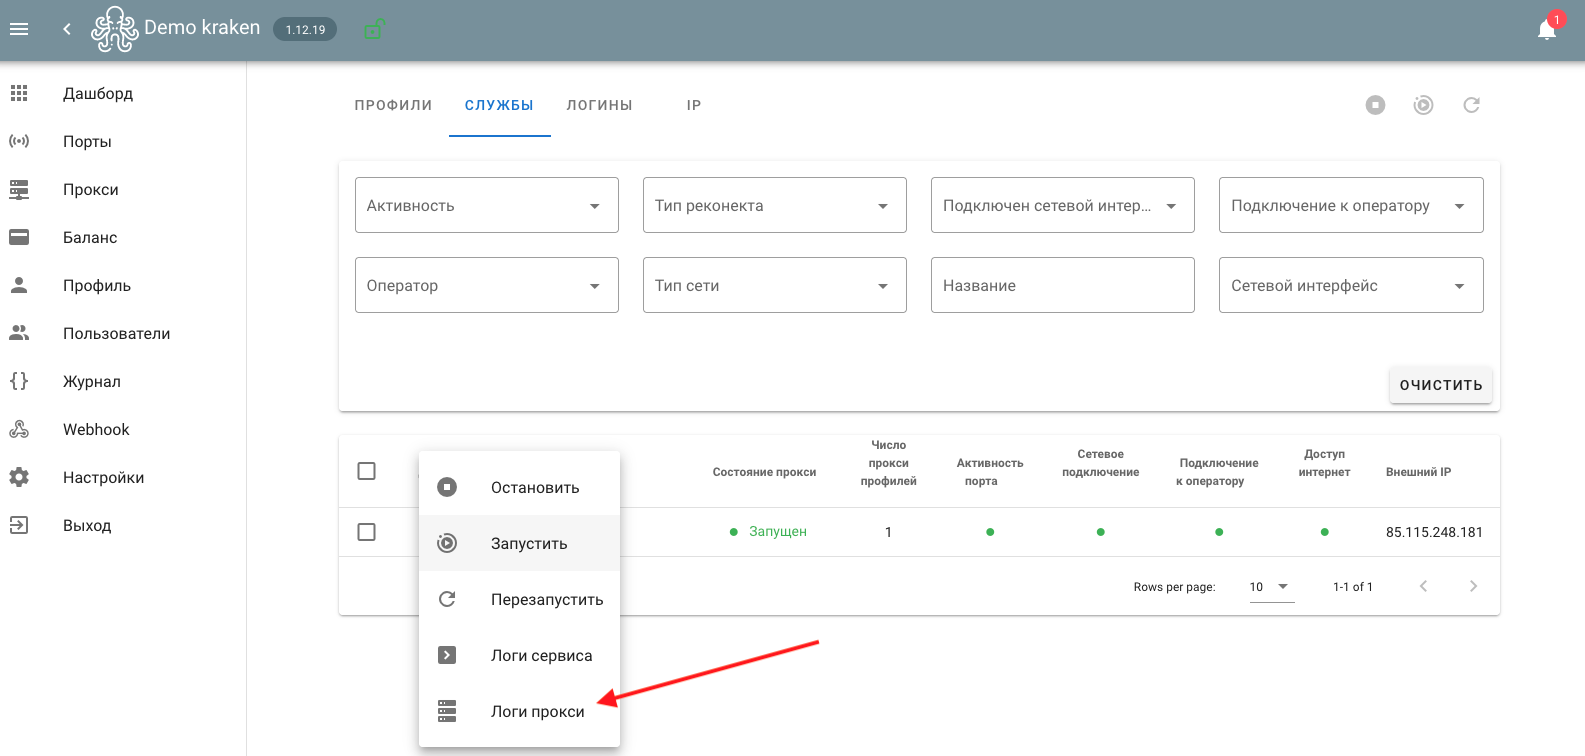
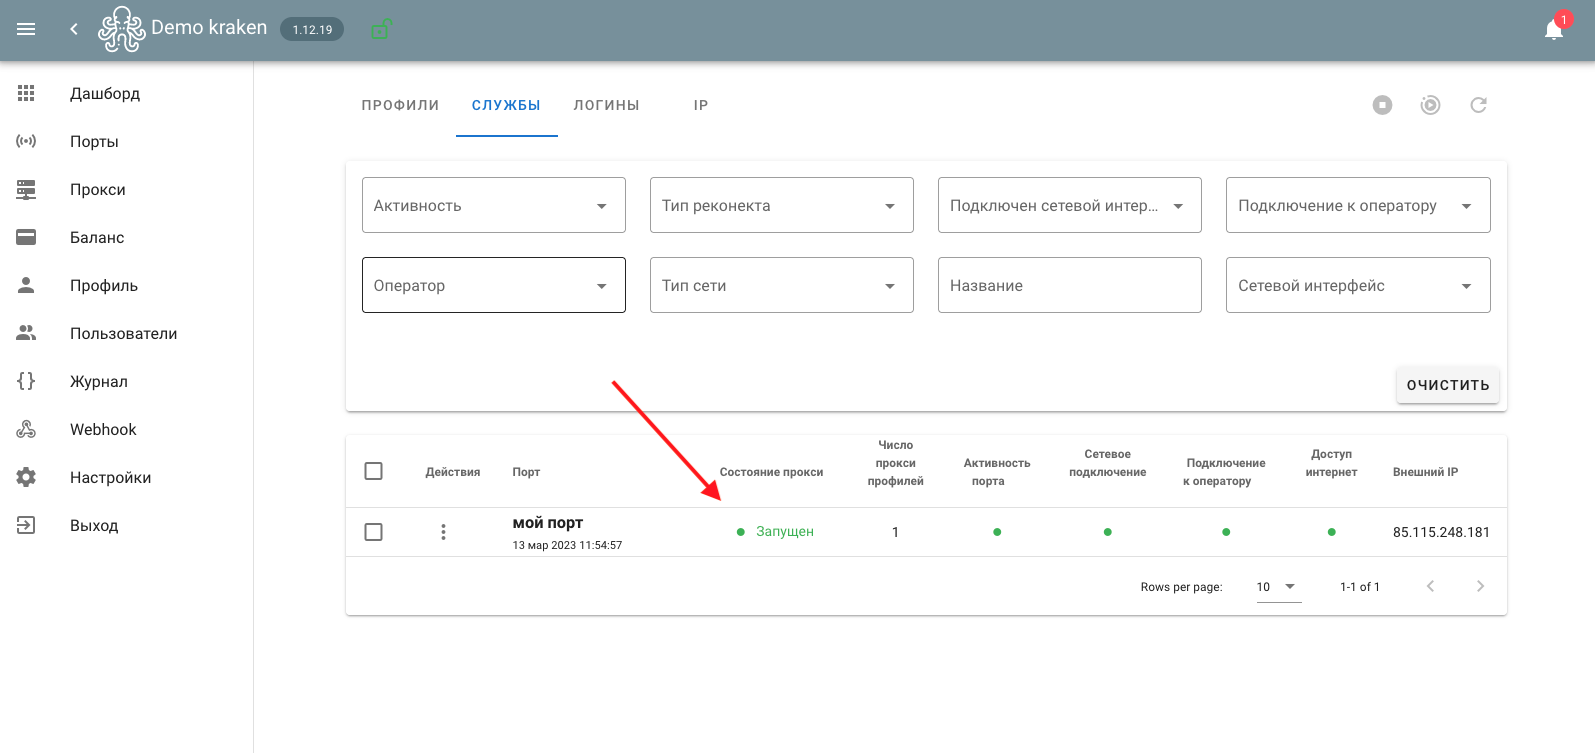
Next, we create a user when choosing authorization by login, and save our proxy profile. Before checking the proxy, go to the “Proxy->Services” section and make sure that the proxy is running successfully.
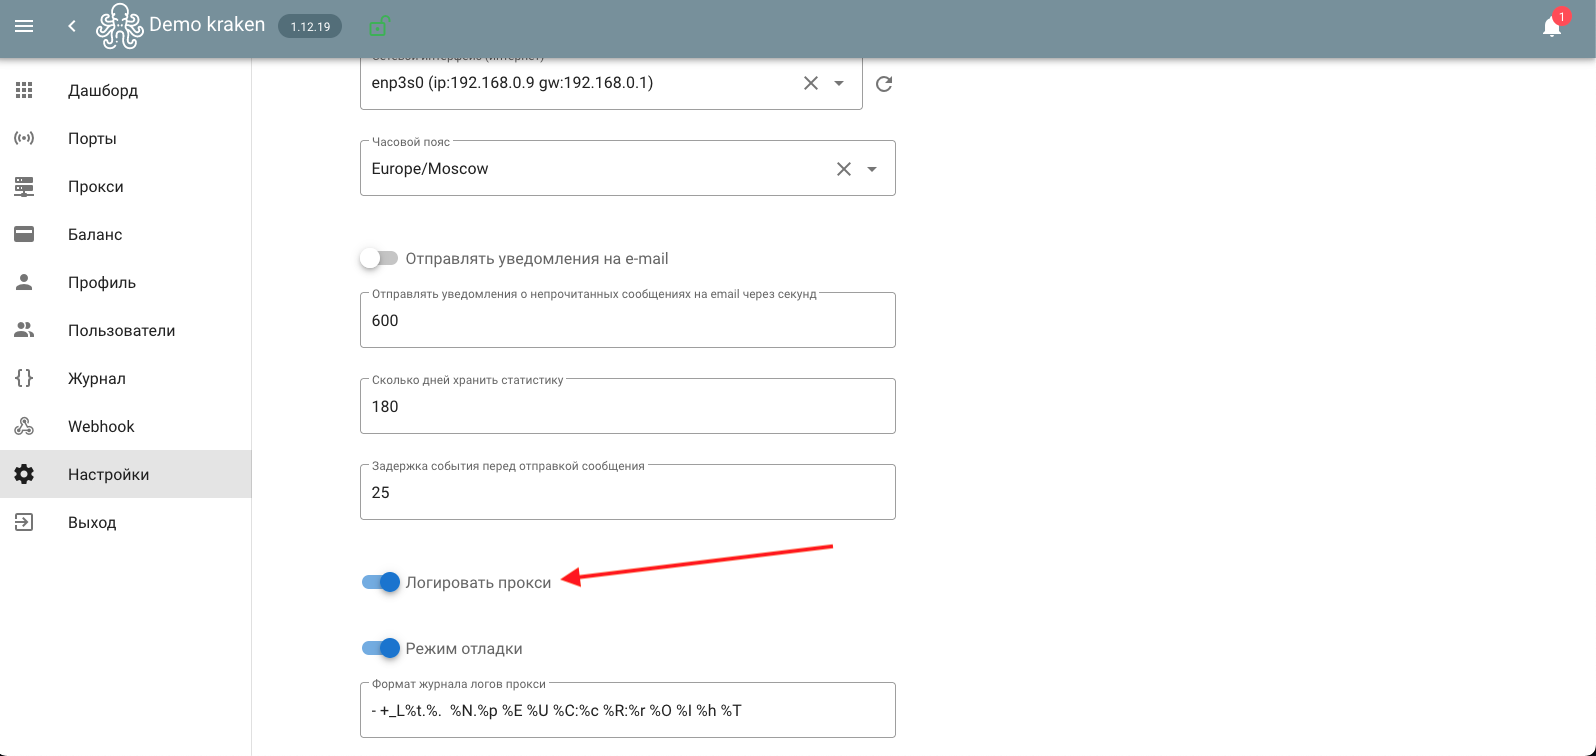
For more detailed information about the proxy status, you can enable logging mode in the general settings, and then resave the proxy profiles.
The proxy logs will become available in the “Proxy->Services” section, select “Proxy Logs” in the drop-down menu of the port service.